The Steady Senior: The Complete Guide To Great Balance Over 60
Training balance is a great way to achieve your health and fitness goals, to prevent falls and keep you getting the most out of life. In this article you'll LEARN what is necessary to improve your balance (PART 1), How to test your balance in your own home (PART 2) and everything you need to improve your balance (PART 3) all in the comfort of your home.
FIRST PUBLISHED: 22/5/2017. LAST UPDATED: 10/2/2024
Good balance is essential to keep you steady on your feet, prevent falls and ensure you get the most out of life!
With good balance, you can go about your days effortlessly!
As we get older, however, it's common for our balance to worsen, which means life becomes harder (and not to mention more dangerous)!
But, BALANCE IS A SKILL! A SKILL THAT CAN BE RE-TRAINED AT ANY AGE!
And,
YOU CAN IMPROVE YOUR BALANCE, NO MATTER YOUR CURRENT CAPABILITIES!
In this guide, I will teach you all you need to improve your balance, show you how you can test your current balance and give you all that is required to begin balance training and keep you balancing well, for life!
All in the comfort of your own home!
You don't need special equipment, and you don't need to join a gym.
It's easy, and it can be enjoyable.
Oh, and by applying what's in this guide, not only will you build great balance, the same exercises help you get stronger, fitter, look better, feel better and increase your confidence!
We are going to make some real progress!
So let's get balancing well!
WHAT WE WILL COVER IN THIS GUIDE:
PART 1: ALL ABOUT BALANCE FOR SENIORS
1.2 HOW YOUR BODY KEEPS YOU UPRIGHT
1.3 WHY BALANCE WORSENS WITH AGE
PART 2: HOW TO TEST YOUR BALANCE
2.1 EQUIPMENT TO IMPROVE AND TEST YOUR BALANCE
2.3 HOW TO KEEP TRACK OF YOUR BALANCE
PART 3: HOW TO IMPROVE YOUR BALANCE OVER 60
STEP 2: DO SPECIFIC BALANCE EXERCISES
THE BEST BALANCE EXERCISES FOR SENIORS
STEP 3: ALWAYS CHALLENGE YOURSELF
STEP 4: HOW TO BE MORE MINDFUL
Before we get started, remember, this guide will only help you if you apply these strategies. Just reading what's here and trying the exercises maybe once will not help you improve your balance.
If you want to improve your balance, read the article and undertake what's set out in this article.
Pledge to incorporate at least 5-10 minutes of balance work into your life a few times each week. Make it simple. Make it fun!
To make it easy for you; I create workouts for mailing list subscribers. So make sure you join up!
PART 1. ALL ABOUT BALANCE FOR SENIORS
1.1 WHAT IS BALANCE
If you had to guess what balance is, most would probably guess something along the lines of “being able to stand upright, without falling”.
Which is good, and all you need to know! However, a better definition is this:
“BALANCE is the ability to maintain the line of gravity of a body (vertical line from the centre of mass) within the base of support with minimal postural sway” [1].
Let’s break this definition down, so it’s easier to understand.
When you gain a better understanding of balance, you know why we do the exercises to improve balance and why we could, or do, fall.
Diagram 1: To lose balance my sway has to move past my limits of stability.
1) Centre of Mass – The easiest way to think of our centre of mass is the point where our weight is concentrated most (orange circle in diagram 1). The lower our centre of mass, the easier it is to stay balanced.
2) Base of Support (BOS) - The area beneath a person that includes every point of contact that the object or person makes with the supporting surface [2, 3].
In this photo (yellow line), my feet are together- a reduced base of support, which means less stability.
A wider base of support increases our stability.
Standing with our feet apart makes standing a whole lot easier because it increases our stability.
Using a cane or a walker makes us sturdier, why? Because we have increased our base of support by increasing the area within the support surface (that being the floor).
3) Sway - The horizontal movement (red arrows at the top of diagram 1) between each side of the centre of gravity (green line) even when a person is standing still [1].
What happens when we are trying to balance in challenging positions? We sway from side to side.
Here is another picture to help you understand everything a little better:
Diagram 2: By standing on one leg my base of support is decreased. Less sway is required for me to become unstable and lose balance.
By decreasing our base of support, (standing on one leg), we decrease stability. It is much easier to sway outside of the limits of stability (blue lines). It now becomes easier for us to lose balance and fall.
We can also decrease the base of support in exercises, to make them more challenging, which, over time, will help improve balance.
To increase our base of support, we can hold onto the chair in front of us to provide more stability and lessen our chance of falling.
There are two types of balance; static balance and dynamic balance.
1) Static Balance - The ability to balance while at rest, e.g., standing still on the spot. (The diagrams above are examples of static balance.)
2) Dynamic Balance - The ability to balance while moving, e.g., walking or reaching forward.
Both types of balance are equally important and both need to be practised to have great balance.
Your aim should be to become as stable as possible by doing balance exercises consistently, without having to rely on any assistive devices (walker, cane, etc.).
An aim that is entirely possible by putting in the work of doing the correct balance exercises.
[Note: Only stop using an assistive device if it is safe to do so. Always get a professional opinion to decide on this].
1.2. HOW OUR BODY KEEPS US UPRIGHT
So how does our body keep us upright? Notice I didn't say "how do we stay upright?"! That's because balance is usually an automatic process (unless compromised in some way).
For every task we undertake, our body automatically receives information from our senses. This information is from our muscles, joints, ligaments and other sensory receptors such as touch, pressure, temperature and pain.
Sensory information also comes from our visual system (our eyes) and our vestibular system (our ears).
This sensory information is sent to our Central Nervous System (CNS) to be processed.
The CNS then cues our musculoskeletal system (system for our muscles, bones, ligaments, joints) into action to perform the appropriate movement.
When we are walking (or undertaking any other tasks), our central nervous system continually sends signals to our musculoskeletal system.
If we were to come across uneven terrain or obstacles or were to trip, for example, during our walk, our musculoskeletal system will receive the information via our CNS and make the correct postural adjustments to maintain our balance and keep us from falling.
This is an automatic process that all happens very, very fast, but slows as we age!
As this process slows, combined with the loss of other factors, e.g., decreased leg strength or proprioception (perception or awareness of the position and movement of the body), it becomes increasingly difficult to maintain balance.
When you train balance and improve balance, this process becomes more effective, ensuring you stay on your feet.
Decreased eyesight (or closing your eyes) or conditions of the inner ear (vertigo, Meniere's disease, ear infections, or prolonged dizziness), also affect balance.
Additionally, certain medications and hypotension (low blood pressure) - leading to dizziness and lightheadedness - can also affect our balance.
1.3 WHY BALANCE WORSENS WITH AGE
As I mentioned above, the process of maintaining our balance slows or deteriorates as we age.
There are factors out of our control that we must accept.
That is, changes in our body (physiological changes) do happen because of ageing itself. We will never be like our young 20, or 30-year-old selves.
However, the good news is, the primary contributor to these physiological changes is not due to ageing in itself, but because we do less as we age.
As we start reaching adulthood, the pressures of life take hold, and we find ourselves with more obligations.
We also get into some poor habits (e.g., sit more often in lousy postures), and we do less and less activity.
A lot of us put these physical changes we see (such as decreased balance, posture and strength, etc.) down to ourselves getting older.
However, the majority of the time, these changes occur because we do less activity throughout the years.
It’s simply because we sit more and move less, that we see a lot of these changes in our physical condition.
We are creatures of comfort designed to do what is most comfortable and, after time, it becomes increasingly difficult to do more activity.
These physical changes we see from lack of use include:
Generalised weakness throughout the body.
A generalised decrease in fitness (our whole body becoming less fit, leading to faster muscle fatigue and shortness of breath).
Decline in posture, changing our centre of mass.
Decreased reaction time.
Decreased balance.
It’s time to accept that the main reason staying active and upright has become tougher and you are not moving as well as you could be is not because of ageing itself but because we have progressively done less and less activity.
You must get it out of your head that decreased balance and, also falls, are a normal part of ageing. This is a myth.
Your BALANCE CAN BE IMPROVED, and FALLS CAN BE PREVENTED
Now that we know this, we should do everything in our power from now on to improve our balance and keep it that way for the many benefits it will bring us.
PART 2: TESTING YOUR BALANCE

You do not need to go to a Professional (e.g., a Physiotherapist) or join a gym to get your balance tested.
You DO, however, have to be careful and take the correct steps for safety reasons.
And... You can also get a more comprehensive test when getting your balance tested by a professional. It is also a good idea so you can rule out any vestibular or visual issues as the cause of any balance problems.
However, when done safely (with a helper and the correct equipment), testing your balance at home is a great way to take your health into your own hands and start making changes.
I've chosen some simple tests you can do to test your balance, and I'll show you how to do them as safely as possible, in the comfort of your own home.
2.1 HOW TO TEST YOUR BALANCE
There are many tests we can use to measure balance.
The aim of testing your balance is to get a rough guide on how well you can balance, and then use these measures as a guide of progress after doing balance training.
I have chosen four tests to give you a rough guide of your balance.
However, before we get into the tests, there is some basic equipment you will need:
EQUIPMENT YOU WILL NEED:
To test and train your balance sufficiently, I recommend the following:
· A tape measure
· Masking tape - Preferably coloured as it is easier to see.
· Timer - You can use the timer on your mobile phone.
· Chair – Standard chair with arms. Not a couch.
· Sturdy piece of furniture - (e.g., kitchen bench, rail, etc.).
· A Wall.
· A helper – grab a family member, friend, exercise partner, whoever to help take measures.
BALANCE TESTS
Now let's get into the testing.
TEST 1 - FOUR POINT BALANCE TEST
Equipment For Test: You will need a timer and a chair
Details of Test:
This first test is a test of our static balance (balance while stationary). This test will challenge your balance in four increasingly difficult foot positions.
How To Perform The Test (photos below):
1. Standing next to the back of a chair or a rail or sturdy piece of furniture, (e.g., kitchen bench) for safety reasons.
2. Starting by holding onto the chair and taking up the first foot position of the test (see below).
3. When you are ready, take your hands off the chair and start the timer.
Do this test without holding onto the chair.
4. During the test, you can move your arms to retain balance (holding onto the surface if required). Once your feet move out of position, the test is stopped and the time recorded in the chart below.
5. If you can safely manage the position for 30 seconds, you can continue on to the next challenging foot position and continue until the final (4th) foot position.
Alternate feet for the single feet stances.
6. Record your results in the table following this section.
NOTE: If you are unable to manage 30 seconds for this foot position, stop the test and record your time.
If you are unable to maintain 30 seconds for foot positions 1 and 2, keep practising these movements, train these movements each day, until you can safely manage 30 seconds for each before continuing.
If you are not improving, see your doctor or Physiotherapist for a more personalised program.
FOOT POSITION 1) Feet Side by Side:
Feet as close together as possible, side by side.
Chair or rail close by for safety reasons.
Hold for 30 seconds, or as long as possible.
If you can hold for 30 seconds, safely move on to the next position.
FOOT POSITION 2) Semi Tandem Stance:
Standing with the big toe of one foot in the arch of the other.
Toes facing forward.
Chair or rail close by for safety reasons.
Hold for 30 seconds, or as long as possible.
If you can hold for 30 seconds, safely move on to the next position.
Alternate Feet.
FOOT POSITION 3) Tandem Stance
Standing with heel on one foot touching toes on other.
Chair or rail close by for safety reasons
Hold for 30 seconds, or as long as possible.
If you can hold for 30 seconds, safely move on to the next position.
Alternate Feet.
FOOT POSITION 4) Single Leg Stance
Standing on one leg.
Chair or rail close by for safety reasons
Hold for 30 seconds, or as long as possible.
If you can hold for 30 seconds, safely move on to the next position.
Alternate Feet.
Understanding Your Results:
Scoring 30 seconds on each test means your balance is good for this test.
No matter your capabilities, you can always be improving. To do this, you must challenge your balance even further by making the balance training harder (discussed later).
There is always work we can do.
Scoring less than 30 seconds on any of the tests, do not be hard on yourself; it just means you need to be practising your balance more so.
Do not be concerned if you score less on one side compared to the other side (i.e., your left foot vs your right foot); this is common.
If you are over 60 and score less than 10 seconds on the tandem stand, you are at increased risk of falling.
No matter your results, write them down with an aim to improve them after your training period.
TEST 2 - STANDING REACH TEST
Equipment For Test: You will need a chair, a bare wall, a tape measure and a helper for safety reasons.
Note before: You can stick a tape measure on the wall to make this easier for you.
Details of Test:
The standing reach test is used to assess our balance when standing and reaching for objects [4].
How To Perform The Test:
1. Standing perpendicular to a wall, place a piece of tape on the wall at the level of your shoulder. This is to reference your start position.
2. Keep a chair within reach for safety reasons.
3. Now stand perpendicular to the piece of tape and roughly 15 cm from the wall, facing straight ahead and feet hip-width apart.
4. Now with the arm closest to the wall, lift your arm to 90 degrees, parallel to the floor. Keep your hand in a fist and stay relaxed, with your feet or torso not moving out of position.
Mark the position of your knuckle on the wall, with a piece of tape. This is the start position (position A).
5. Now reach out in front of you as far as safely possible, keeping your arm parallel to the floor.
Ensure you remain balanced without your feet coming out of position. This is the final reach position (position B).
6. When you have reached out as far as you can, have the person helping you mark where the knuckle of your fist is with a piece of tape.
Ensure you don't overreach and lose your balance.
A - B = Reach Distance
7. Using the tape measure, measure the distance from the two tape points and record the results in the table following this section.
8. Complete a practice run and then have three attempts of this test.
9. Average the results of the three tests and record your results for later use.
Understanding Your Results:
Scoring less than 18.5 cm indicates you have an increased risk of falling.
No matter your results, write them down with an aim to improve them after your balance training.
TEST 3 - TIMED UP AND GO (TUG TEST)
Equipment For Test: Chair, Tape Measure, Tape, Helper
Details of Test:
The TUG is another test of our balance and our mobility.
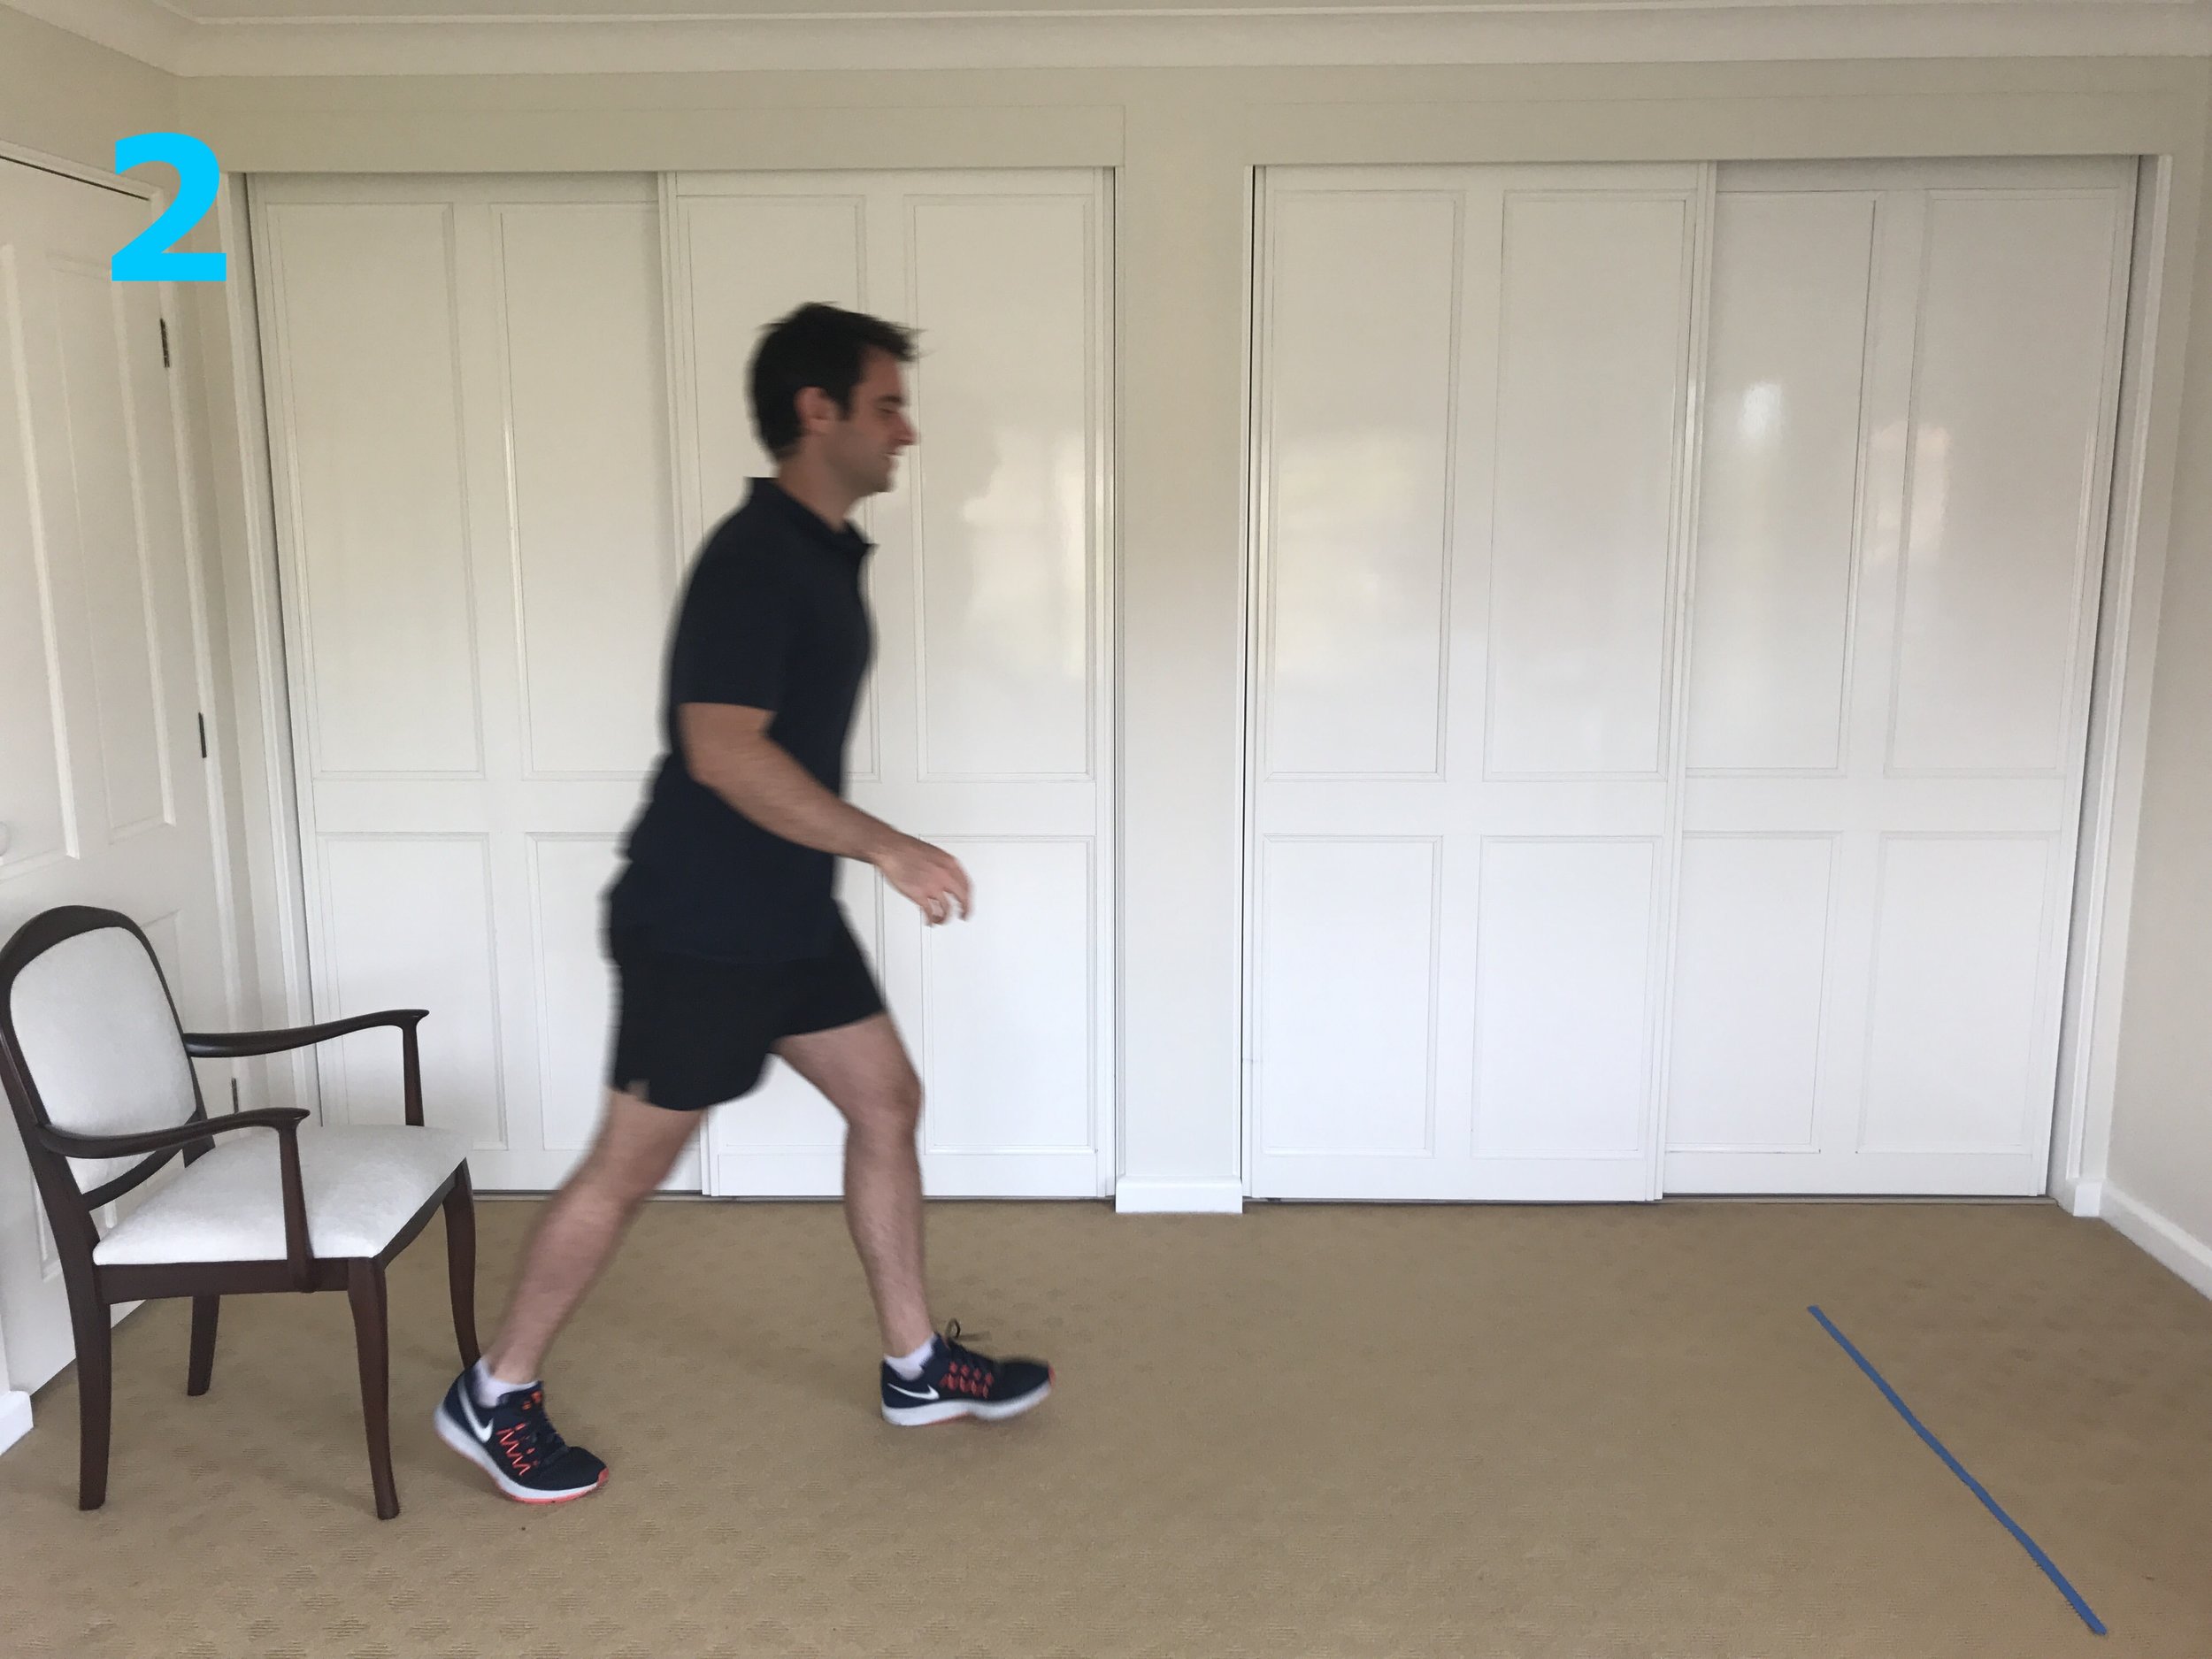
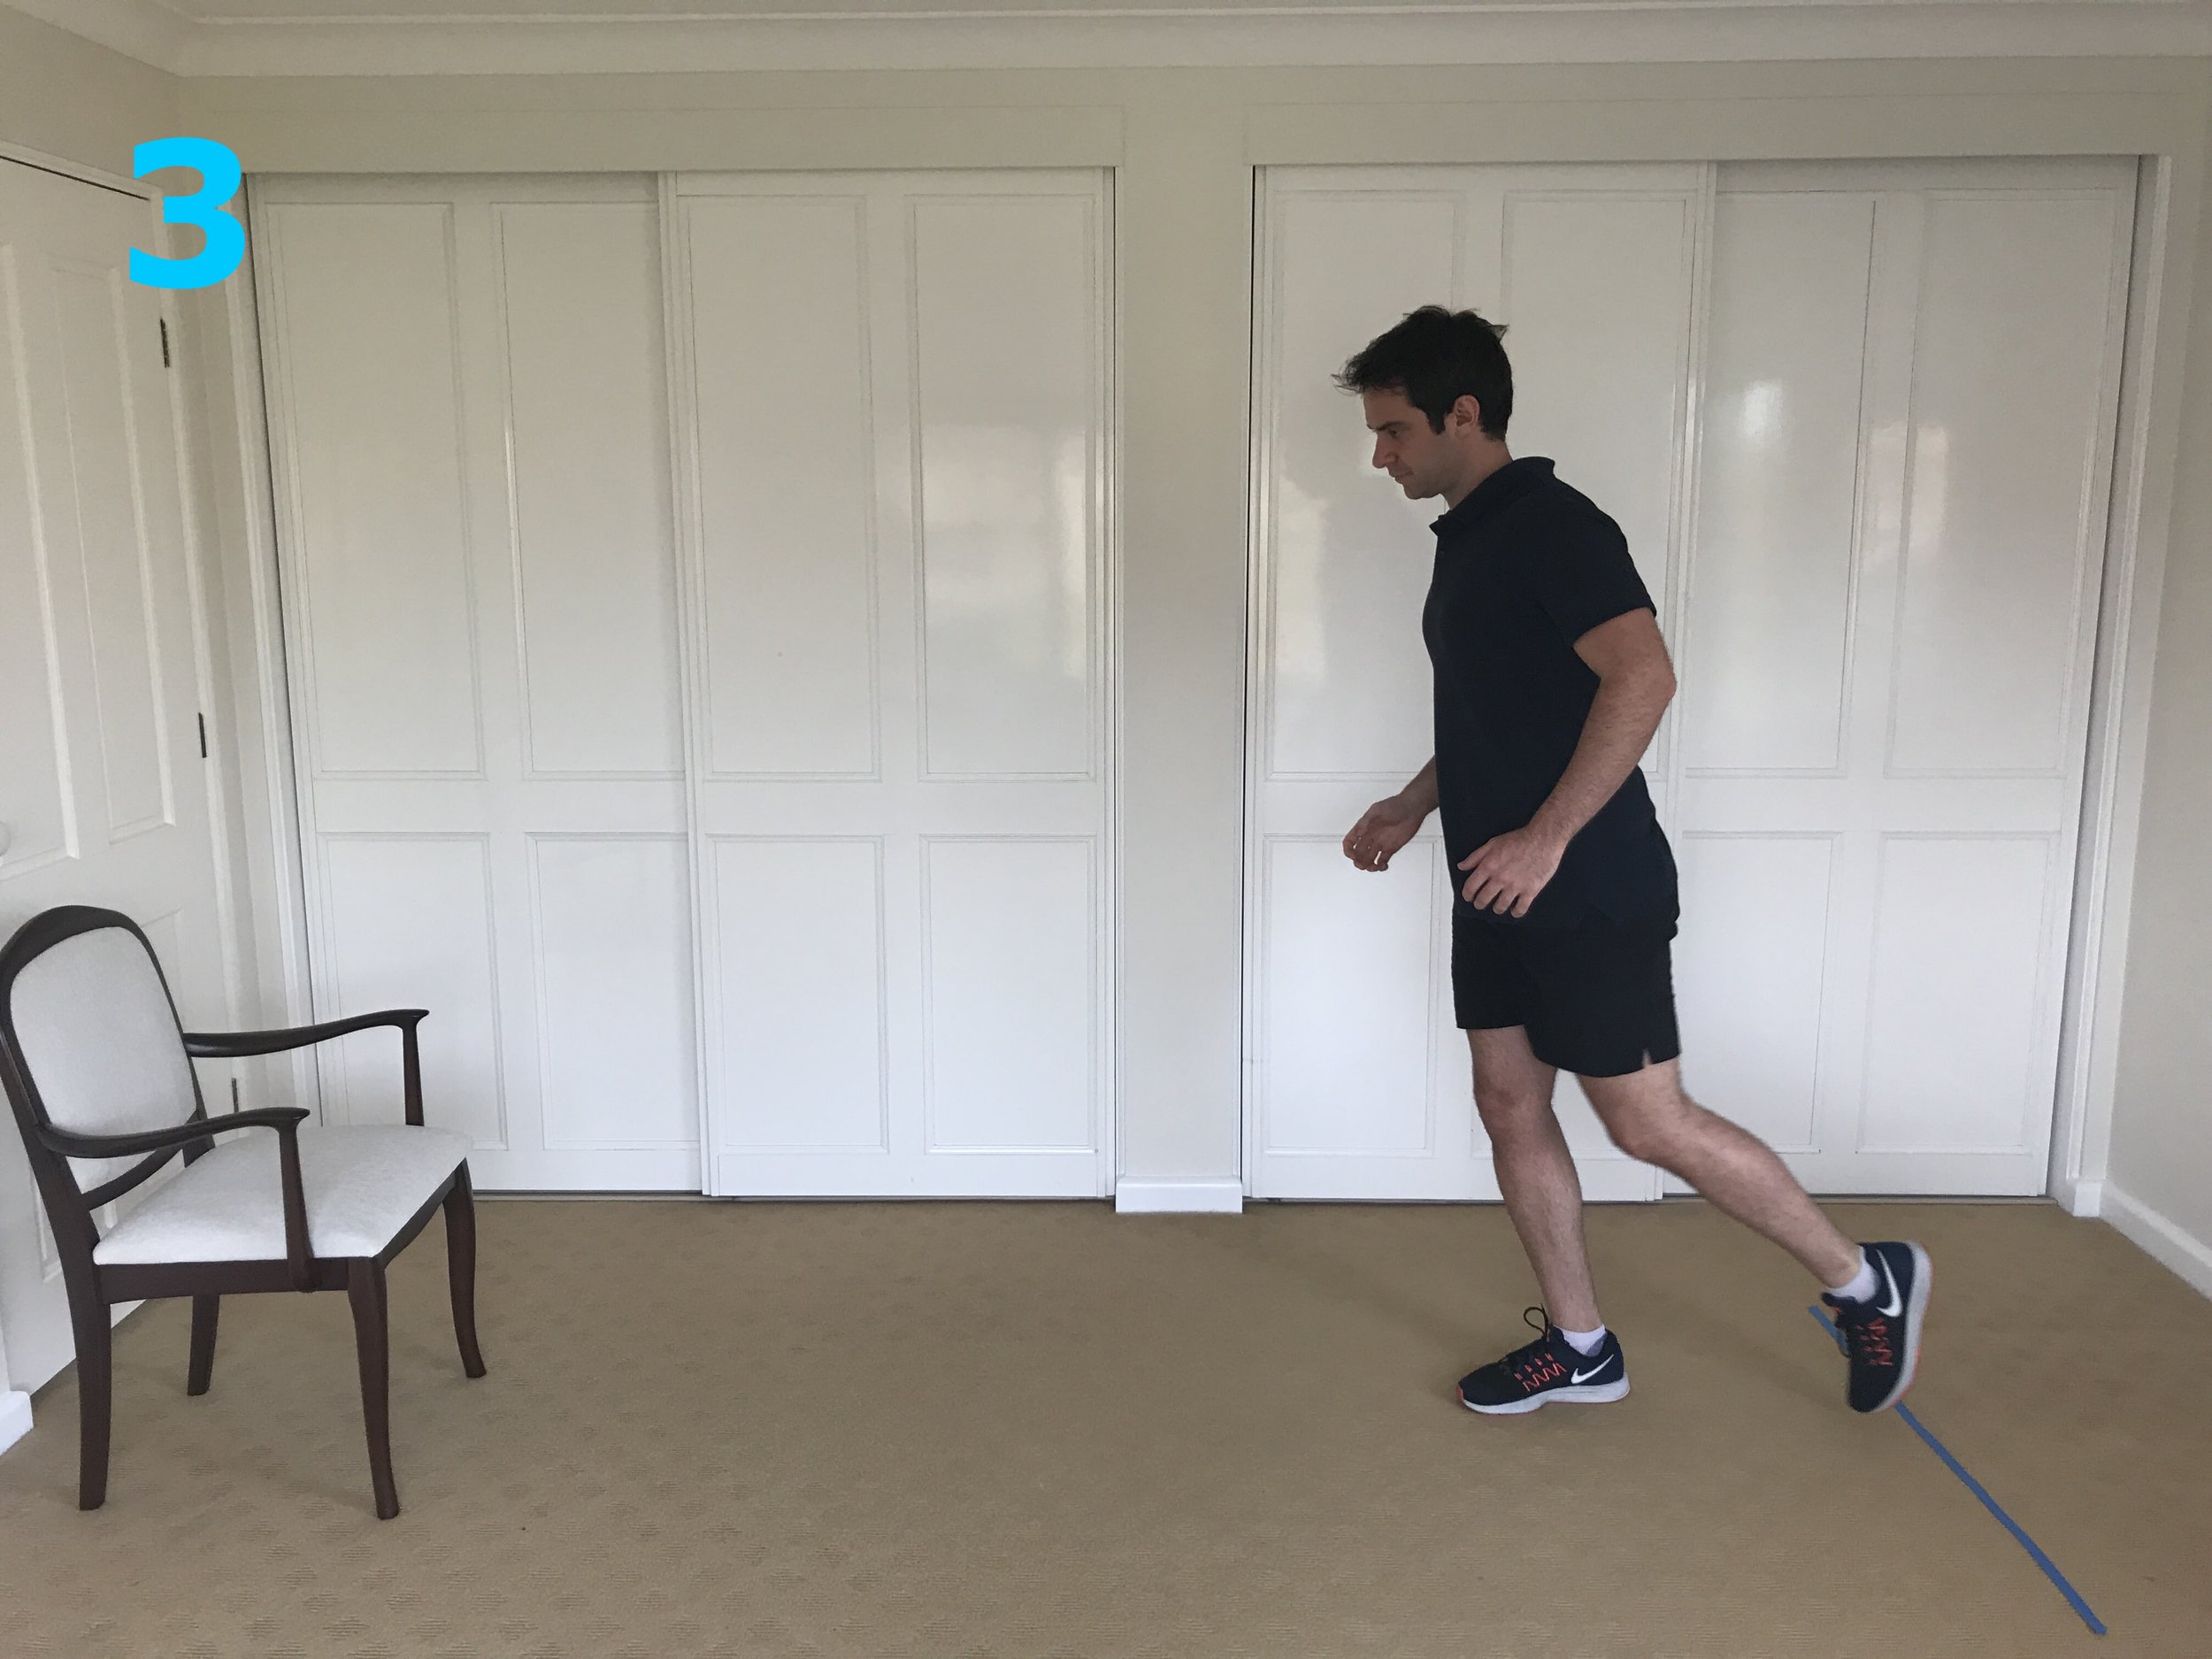
In this test, you will stand from a chair, walk 3 metres over a line, turn around, walk back to the chair and sit down.
How To Perform The Test (photos below):
1. Ensure you have a friend or family member with you to help you with this test.
A friend can take a more accurate reading of the time it takes you to do the test and, additionally, if your balance is not so good, it’s good to have them there for safety reasons.
As with all balance tests, ensure they do not assist you with any parts of the test, but it is a good idea to have them standing alongside you.
2. Place your chair in an open area of your house, on flat ground without any obstacles or trip hazards in the way.
3. Using your tape measure, mark 3 metres from the chair and place a piece of tape to mark this spot.
4. Start seated in the chair, with your hands on the armrests and back against the backrest.
5. Your helper will say “GO” and will start the timer. You are to stand from the chair, walk to the line, turn around, walk back to the chair and then sit back down. Walk at your normal pace.
6. Once your buttocks have touched the chair, the test is complete, and your helper will stop the timer.
7. Complete a practice run of the test to get the hang of the test but give adequate rest before the scoring test to ensure you are not tired.

8. Perform this test twice and average your results.
Note: If you usually use a walking aid of some sort (for example walking stick, walker), use this during the test.
Understanding Your Results:
Studies have shown that if your time is over 13.5 seconds, you may be at a greater risk of falling [5].
No matter your results, write them down with an aim to improve them with balance training.
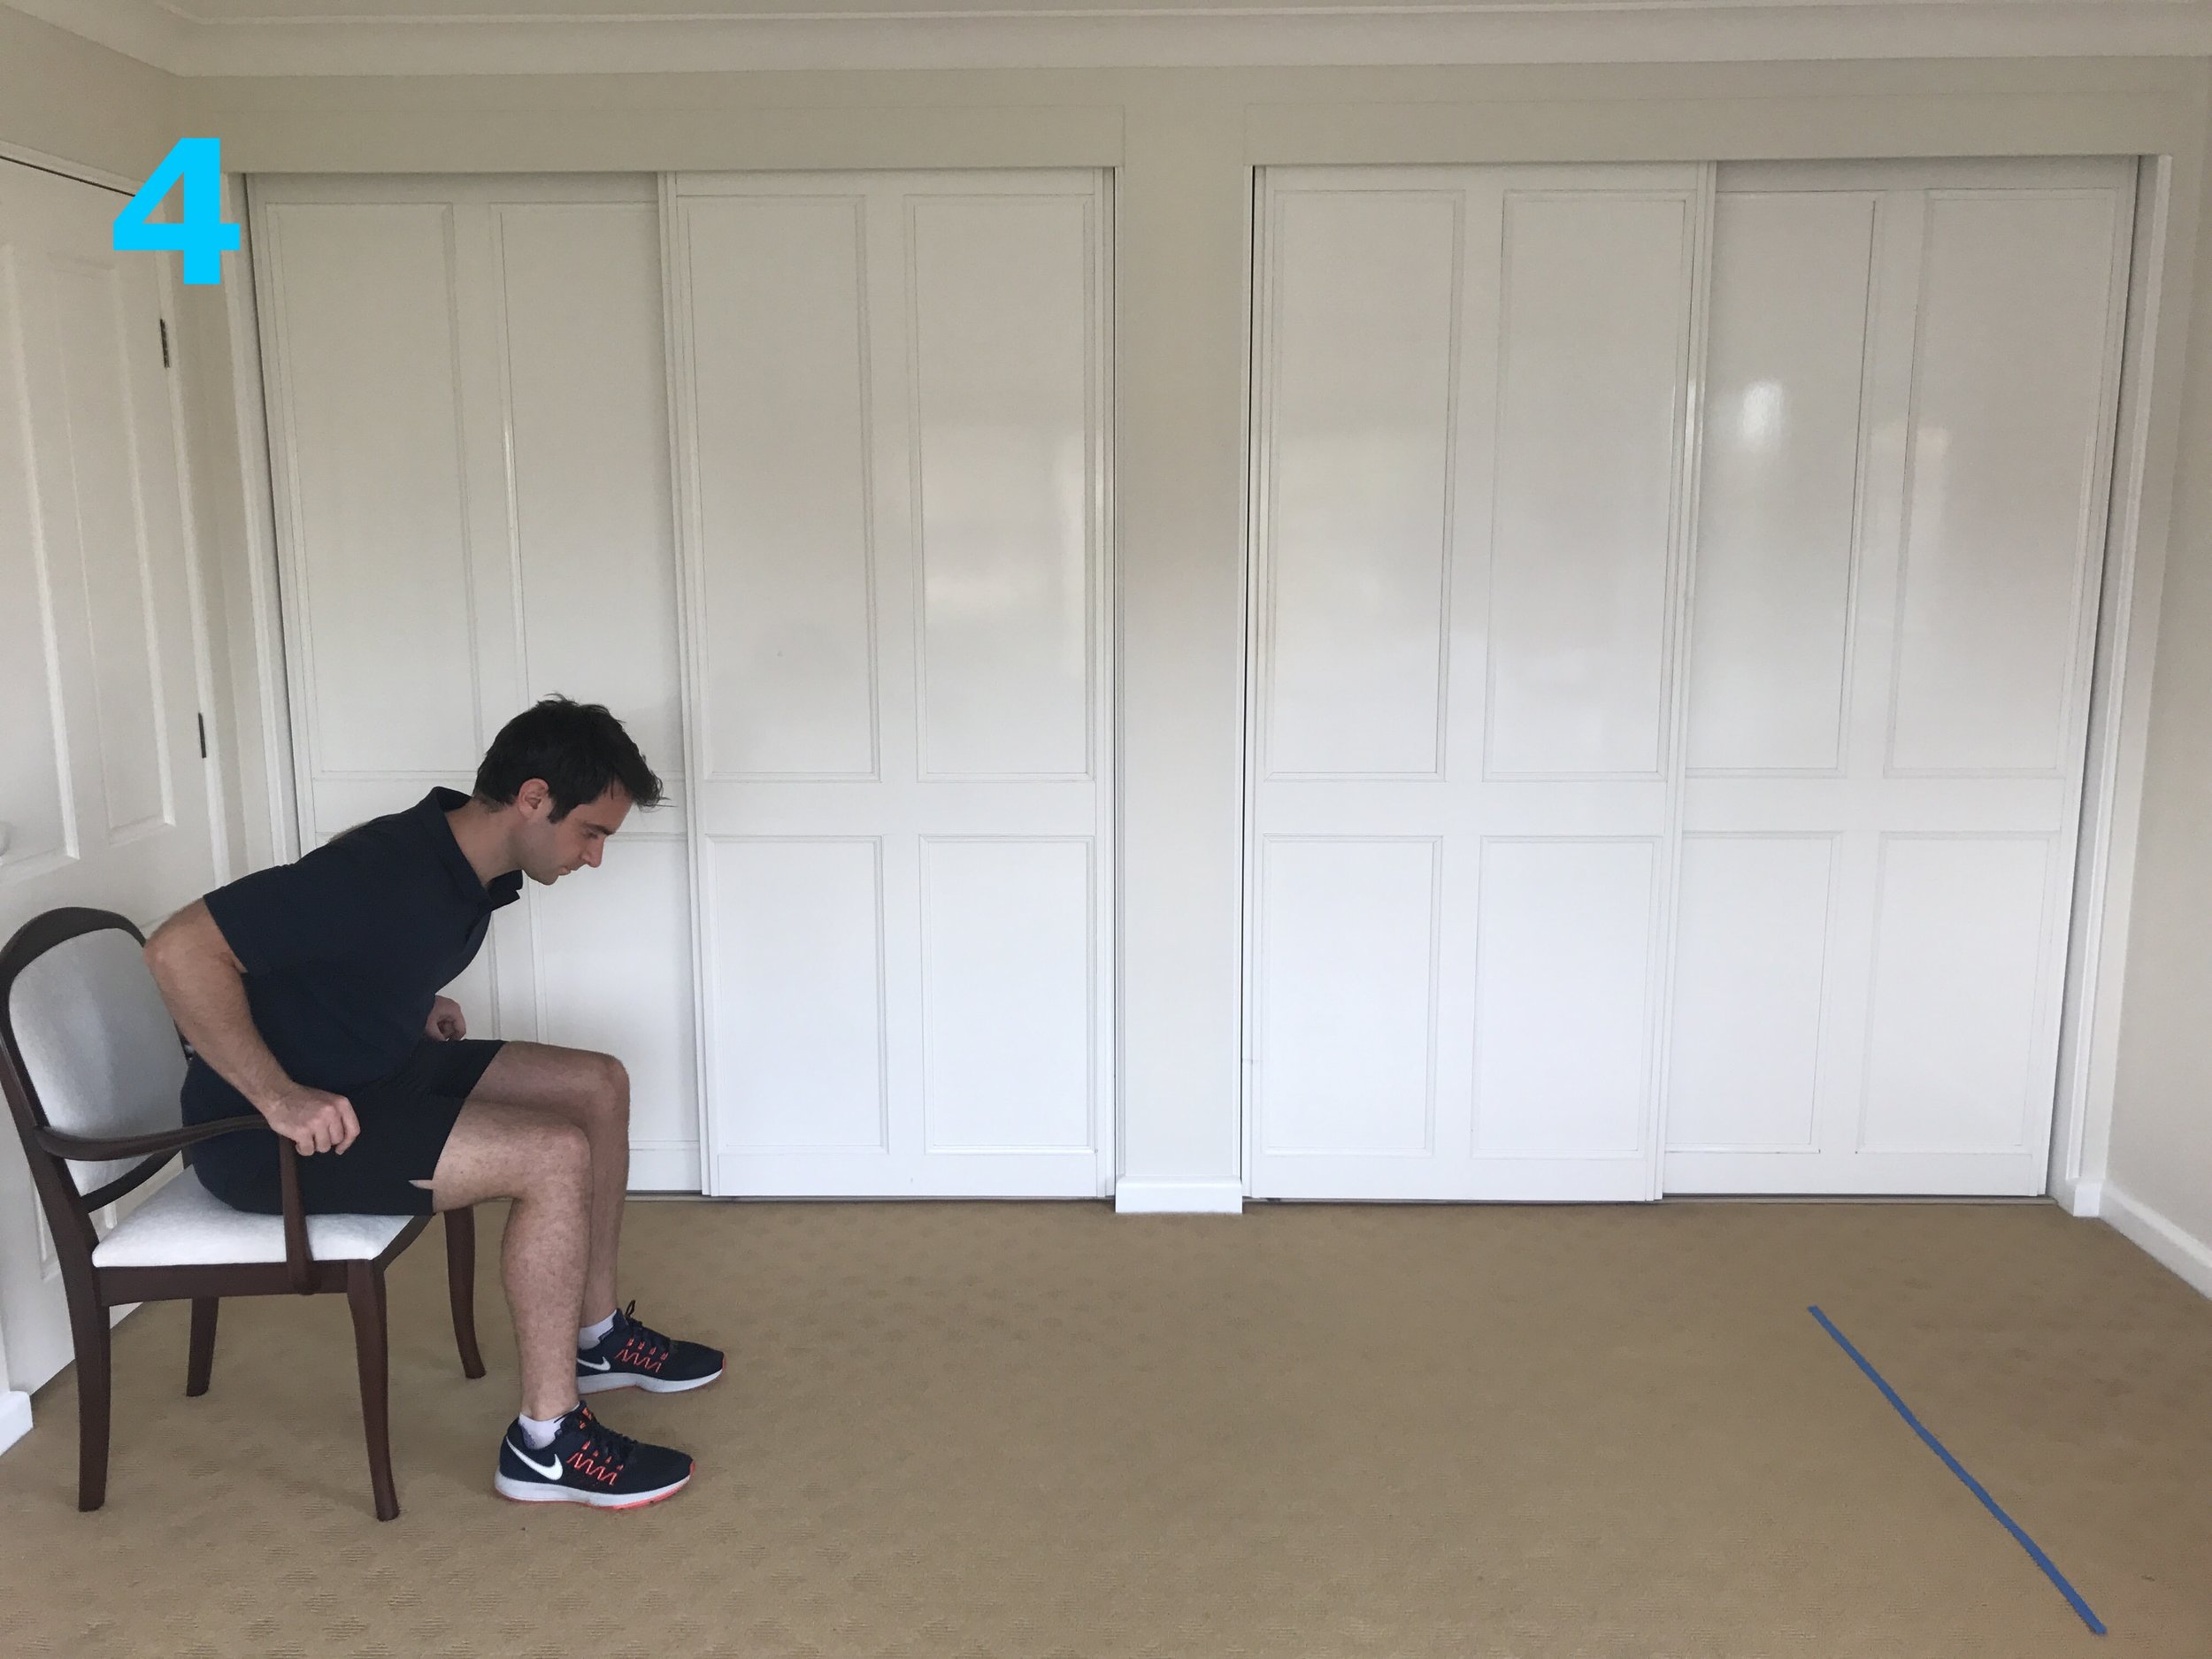
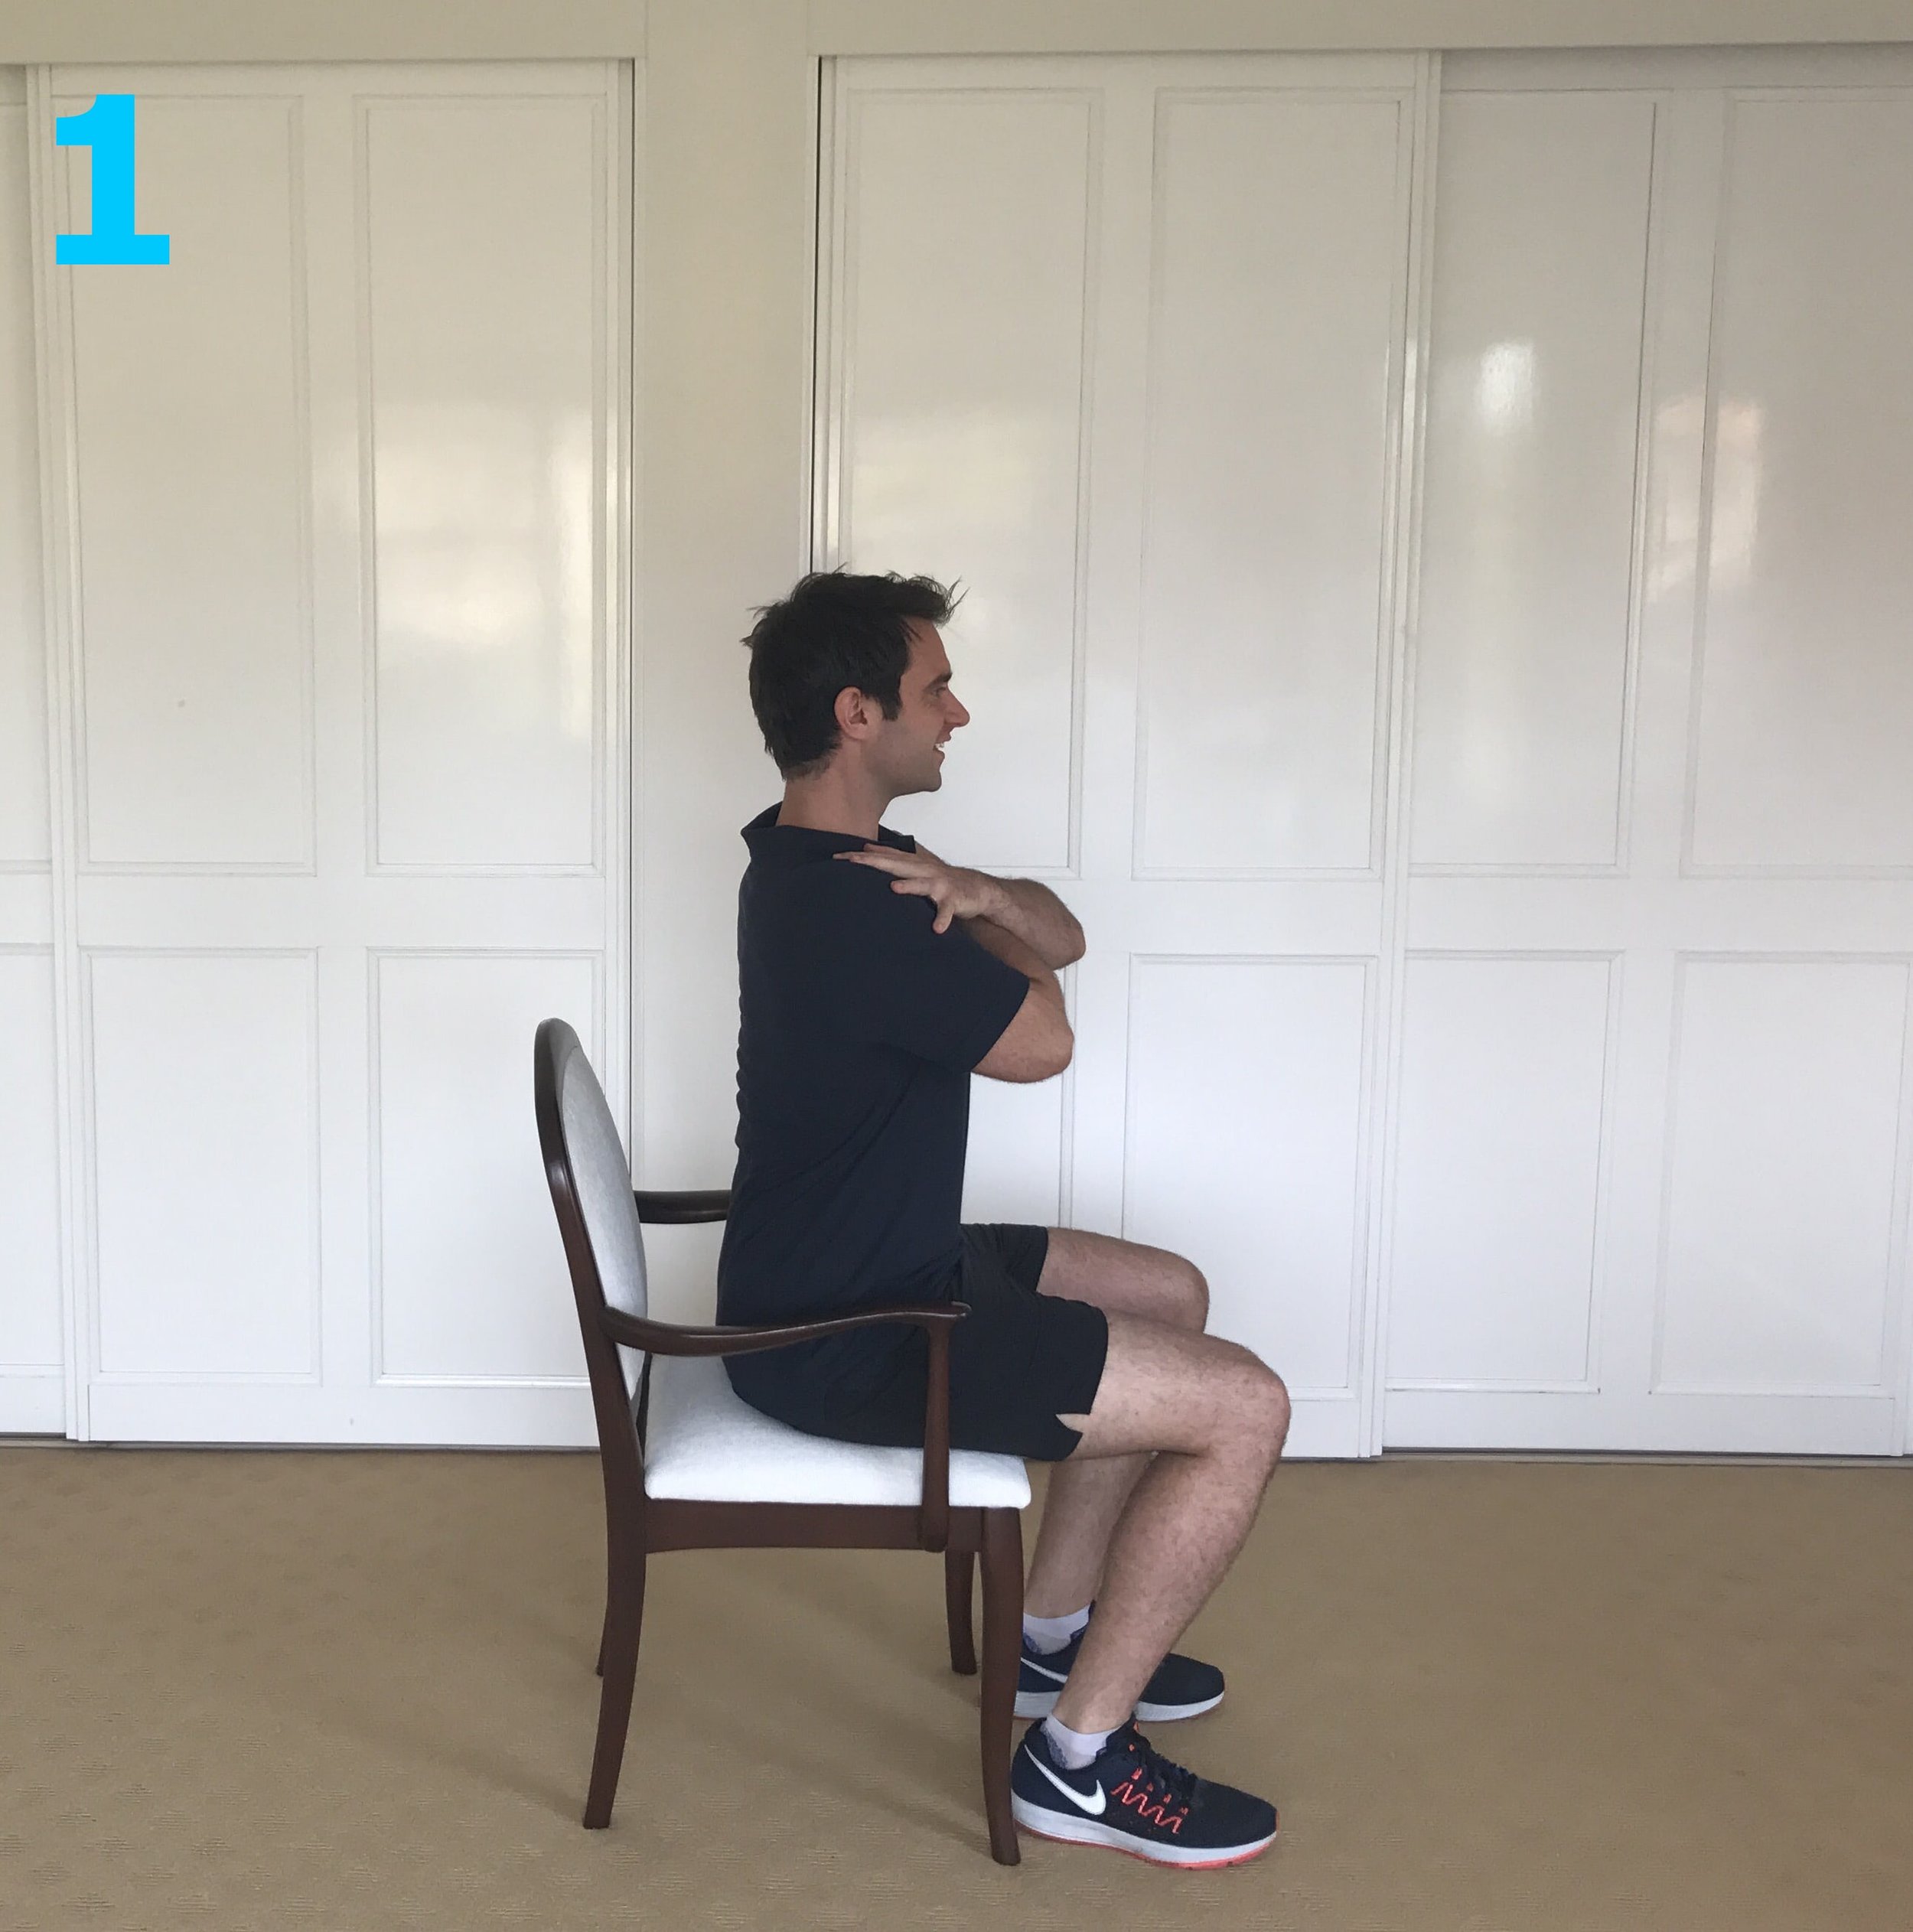
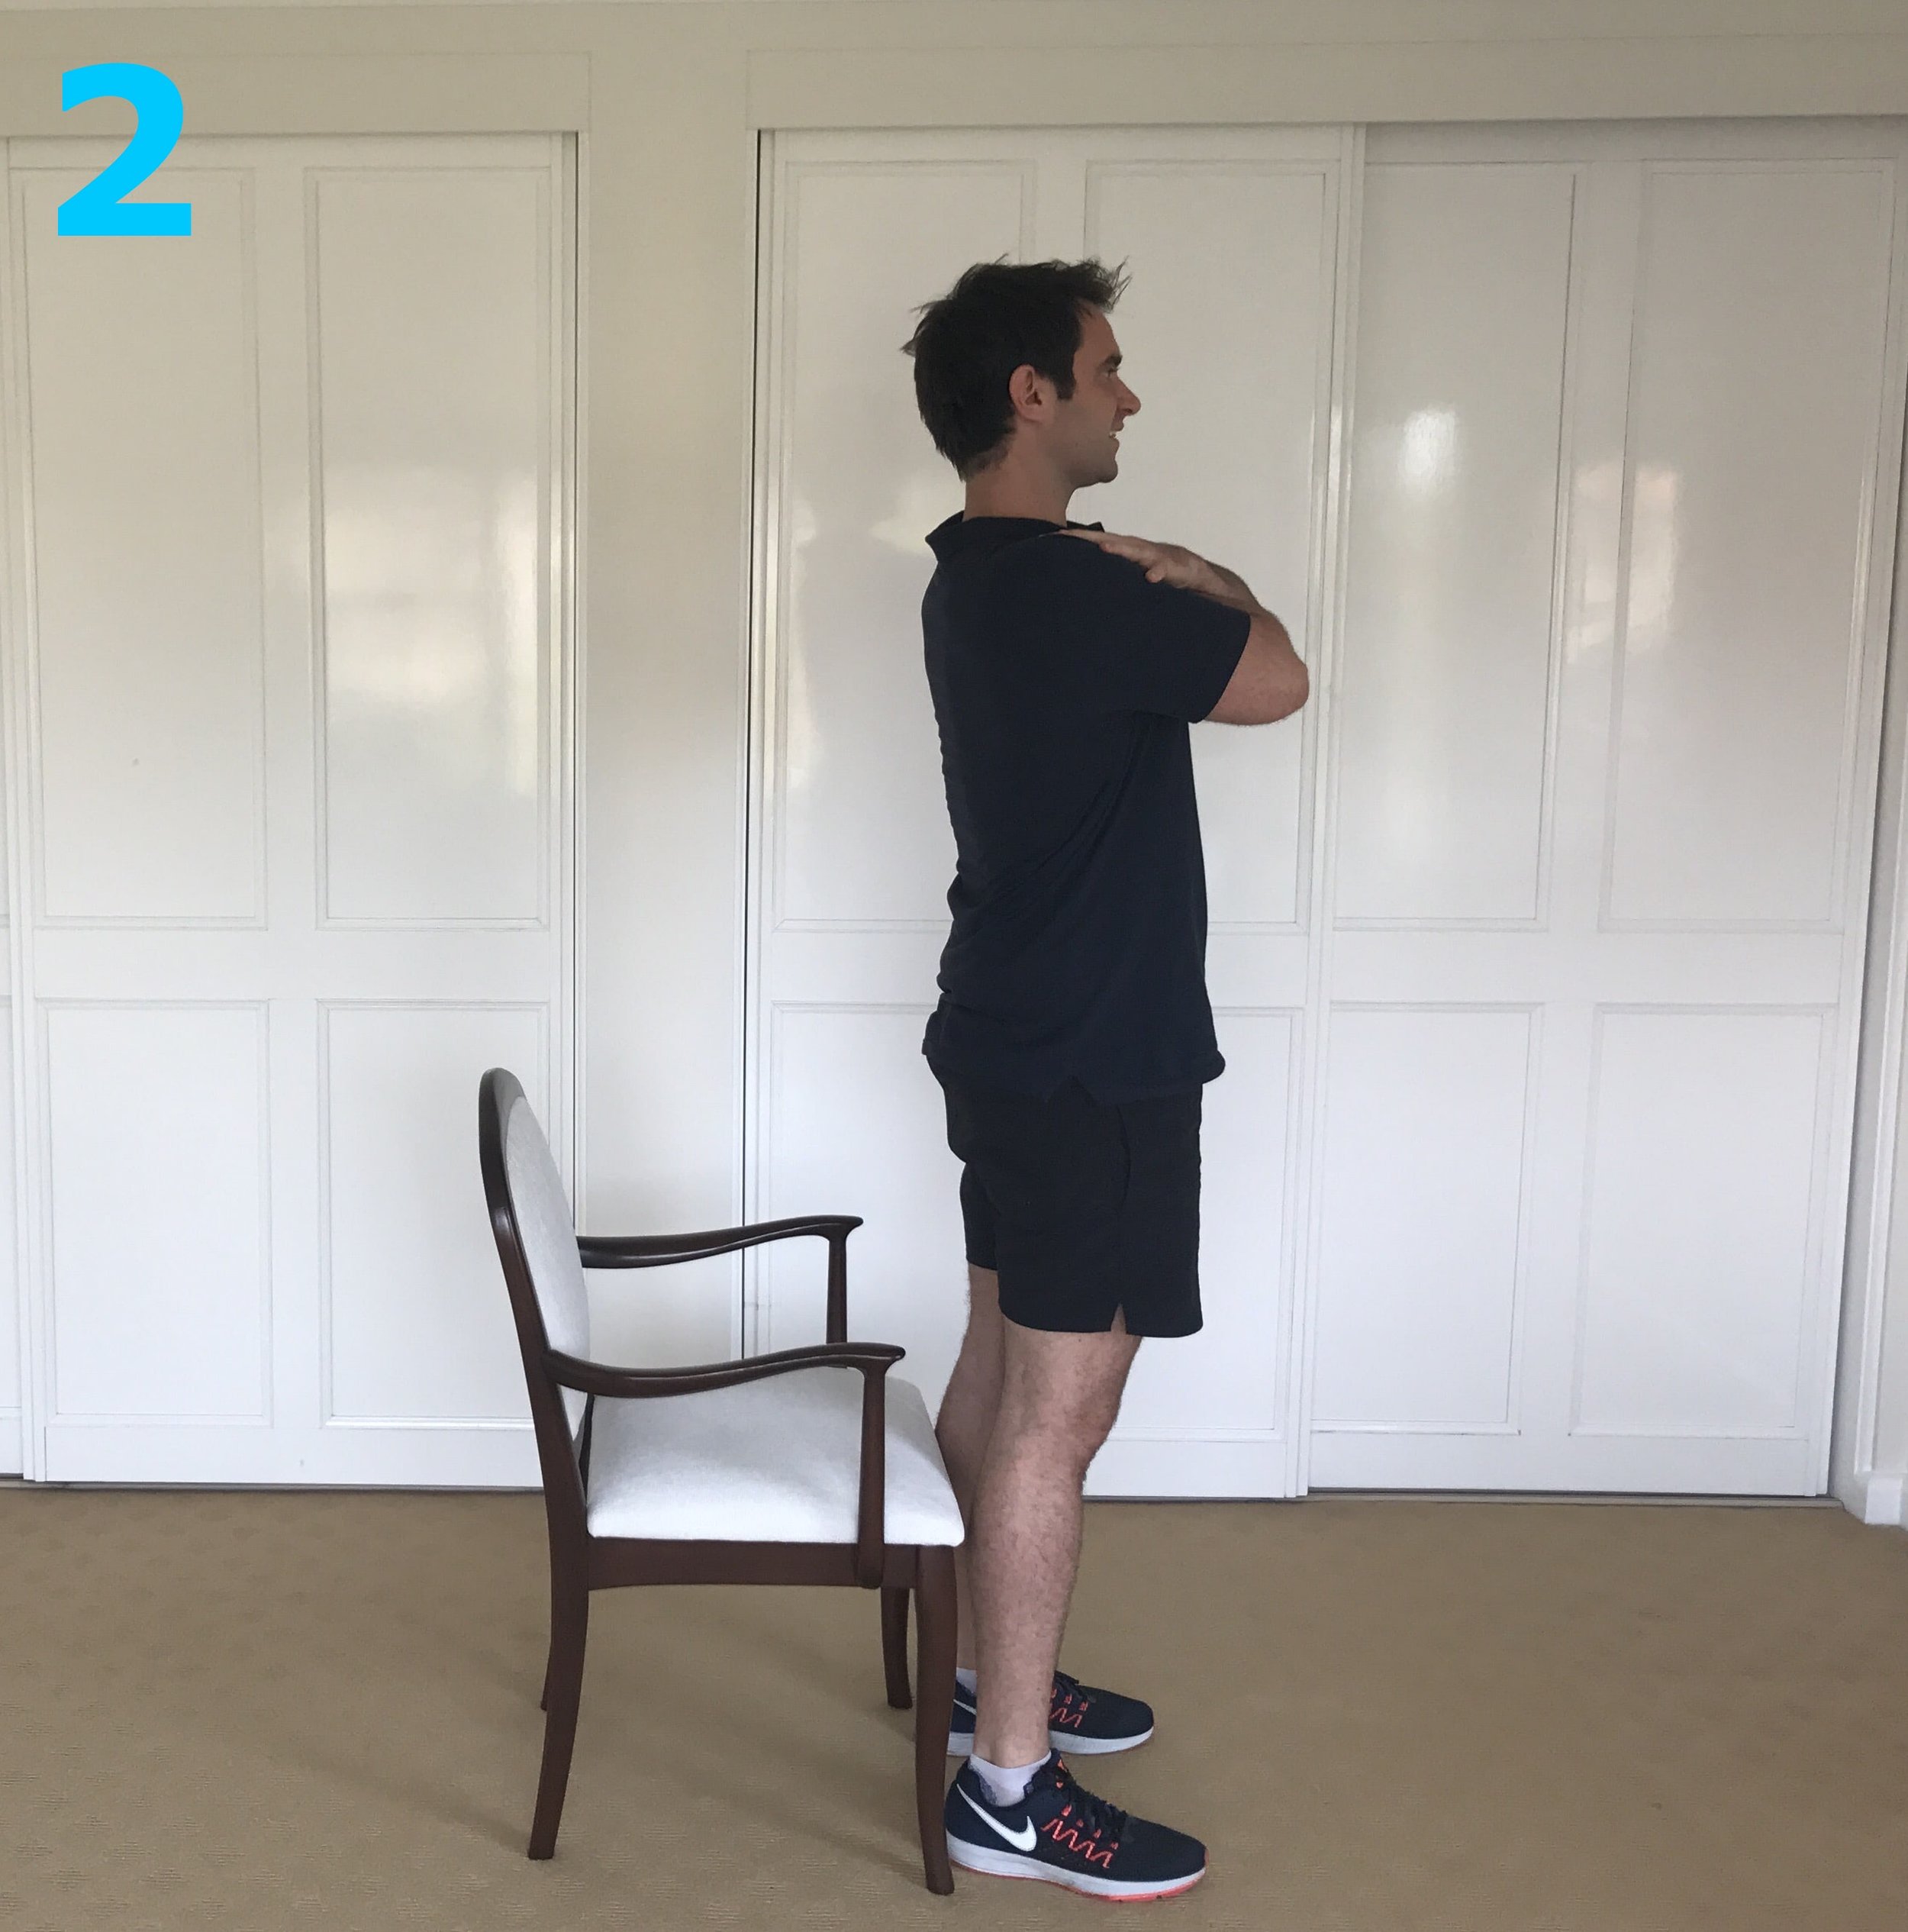
TEST 4 - Sit to Stand For Five Test
Equipment Needed For Test: A Chair, A Timer, A Helper.
Details of Test:
This test is used to test our lower limb strength and power. It is a functional test as sitting and standing from a chair is something we do many times during the day.
This test measures how long it takes you to stand up and sit down five times.
How To Perform Test:
1. Have a helper to time you or hold the timer in your hand.
2. Start seated on the chair.
3. You’re going to time how long it takes you to stand up and sit down [You will start the test (and the timer) as soon as your buttocks leave the chair. And stop the timer (finish the test) when your buttocks are on the chair after the fifth stand].
4. Place your arms across your chest, not holding onto the armrests. Feet hip-width apart.
[If you need to hold onto the armrests, this is fine. However, note it down. You will most probably find after training and improving your balance and strength you will not need to hold on anymore.]
5. When standing up - ensure your knees and hips are straight, and the back of the knees aren’t touching the chair.
6. Ensure when you sit down it is in a controlled manner, not flopping down into the chair.
7. Practice one stand and sit before commencing the five attempts, to get the hang of the test, but do not tire yourself.
7. Perform this test and record all results for later use.
Understanding Your Results:
The normal measures for age ranges are as follows [6]:
60 to 69 years old: 11.4 seconds to complete the test.
70 to 79 years old: 12.6 seconds to complete the test.
80 to 89 years old: 14.8 seconds to complete the test.
No matter your results, even if you can’t perform one sit to stand. Write it down with an aim to improve them after training your balance.
2.3 TRACKING YOUR BALANCE
When you start performing balance exercises consistently, you will begin feeling the differences in many ways.
You'll be more confident going about your day and movement will be effortless.
However, if you are super keen and want to track how much you are improving with your balance, I have created a table to help you track your results. To download this table, click the button under the video below.
After training (next section), you can then retest and compare your results to see how you are progressing.
If you found you had some trouble with these tests, this is fine. These tests are only a guide to check your balance and track your progress.
On the other hand, some of you may find the tests very easy and scored quite well in them.
Great. It means your balance is at a level where you can function well in your day-to-day life. However, this doesn't mean you shouldn't do balance exercises.
No matter what stage you are at with your balance, there are always ways to challenge yourself and be improving. With exercise comes many benefits.
For an easy to follow balance tracking video, watch the video below.
Also, you can track and record your balance by downloading the below.
Now we’ve got an idea of where your balance is at, let’s now start improving your balance!
PART 3: HOW TO IMPROVE YOUR BALANCE FOR SENIORS
STEP 1 - GET MOVING
The first and most important step in improving our balance and our quality of life is to get active. You need to get off the couch and get your body moving.
Movement is health. Movement is medicine.
Being active or exercising doesn't have to be boring or a chore.
Do what you can to make it easy. Do what you can to make it fun. Do whatever it takes to ensure you'll stick to moving more. Consistency is what's most important.
Go for a walk in nature, go for a swim, try a new activity if you can (examples - Tai Chi, lawn bowls, ten pin bowling, aqua aerobics, golf, tennis) the ideas are limitless, just get moving, within your capabilities.
My recommendation is to go walking every day outdoors for at least 10 minutes.
Have fun with it. Mix it up. Go on different walks. Attempt different terrains. Walk up stairs. Down stairs. Walk on grass or in shallows, and sand of your local beach. Go bushwalking. Walk faster. Slower.
Have fun and find the inner child we all have inside of us. Get outdoors and enjoy what mother nature has to offer.
Don't get carried away and do too much too soon, however. Don't try anything out of your capabilities.
If you're walking up many stairs for the first time in a long time, take breaks, use the rail and ask a friend or family member to come along for safety and to have some company. Take your walking aid if you need to.
Hurting yourself or falling would make both of us unhappy.
So make sure you slowly progress your walks, mix it up and continue to challenge yourself each week.
Yes, you're at higher risk of falling by getting off the couch, but done safely and when you enjoy the activity, you stay consistent.
There are many reasons why staying active is essential for better balance and better physical health.
You are training your heart which will make you fitter; you are training all the muscles in your body which will make you stronger (even the little ones that help with balance), you are ensuring your joints don't stiffen up, you are training your body to respond to different terrains. You will be decreasing your falls risk and improving your balance.
START NOW!
Get the all-clear from your doctor and begin with at least 10 minutes a day of some physical activity that you enjoy. Only 10 minutes, you can do it!
Always be thinking of ways you can incorporate more activity, or exercise, into your life.
STEP 2 - DO SPECIFIC BALANCE EXERCISES
Now we are moving more; we are going to incorporate some balance exercises into our life to directly improve our balance.
When performing these exercises, ensure you focus on proper technique; this is the golden rule for any exercise.
Quality is more important than how many of the exercises you can do, how fast you do them or how much weight you lift (if doing some resistance training).
With that in mind, if you feel the exercises do not feel right, causing pain or at first sign of fatigue, stop them.
You want to ensure you are performing the exercises correctly, working within your capabilities and, at the same time, challenging yourself, so you are getting the most out of the exercises and hence, improving your abilities.
THE BEST BALANCE EXERCISES FOR SENIORS
Specific balance exercises are essential to improve your balance and you want to be performing the best exercises to make greater improvements in a shorter time.
CLICK HERE FOR THE BEST BALANCE EXERCISES FOR SENIORS
Make sure you have read this entire article, from the beginning, before progressing to these next steps.
Additionally, for videos you can follow along with to improve your balance, head to the balance section of this website (click here) and follow along with the balance videos.
STEP 3 - ALWAYS CHALLENGE YOURSELF
For some of you, performing these balance exercises may be too difficult. For others, they could be too easy.
A one size fits all program is not possible. We are all unique people with different capabilities.
The good news is, by understanding more about your balance and your base of support, you can modify the exercises to make them easier or more challenging depending on your capabilities.
Remember that if we increase our base of support, we are more stable. When we decrease our base of support, we are less stable.
If any of the exercises are too hard and you find yourself swaying too much, we can take it back a little and make it easier by increasing our base of support.
If you find the exercises are too easy, it’s time to make them harder, to challenge yourself.
Always take note of your support base for each exercise as it’s a good way to see how much we can progress and improve each week.
Here are some ways to vary our base of support to make it easier and harder.
Each variation starts at less challenging to more challenging:
Using Walking Aid: e.g. - Walker, Four Point Cane, Single Point Cane
Change Upper Body Supports: e.g. - Two Hands, One Hand, One Finger, No Hands
Change Feet Position: e.g. - Legs Wider Apart, Legs Closer Together, Semi Tandem, Tandem, Single Leg Stance
Change Surface: e.g. - Stable Ground, Foam Pad, Pillow, Cobble Surface, Wobble Board
Other ways we can challenge our exercises are by:
Challenging our hearing systems (vestibular) and visual systems.
Challenging Hearing System – Turn Head from side to side.
Challenging the Visual System – Close Eyes.
Add challenges/tasks: e.g., catching a ball, solving problems, holding a glass of water, turning your head, adding resistance bands or dumbbell, adding a foam board.
Examples:
If you find the single-leg stance too easy, you can close your eyes or turn your head to each side during the exercise. This will make it more challenging.
You can also add in a pillow or a foam board.
If you are finding the single-leg stance too hard, you can make the exercise easier by holding on with one hand and working up to the time required.
STEP 4 - HOW TO BE MORE MINDFUL
I want you to think for a second and tell me, are you one to lose things?
Are you easily forgetful? Have you been known to be clumsy? Bump into things?
If so, I hate to break it to you, but you have a busy mind.
When our minds are busy, we are less present, and we tend to do careless things.
We've always got bruises because we bump into things. We can never find our wallet or keys. We trip because we didn't see that garden hose in front of us.
We are away with the fairies and mindfulness is our tool to bring us back.
Mindfulness is not usually something thought of when trying to improve our balance.
However, it is something I want you to really think about and take seriously.
Mindfulness techniques are growing in popularity, and it's not just a modern trend. There is increasing evidence of the benefits of mindfulness to wellness and other areas of life. In short, it works.
As with everything else I've mentioned on your journey to good balance, you must ensure you are doing what you can to decrease stress and have a clear head/calm mind, every day.
Stress directly affects our balance.
Higher stress levels can cause a decrease in balance performance. Additionally, many patients report an increase in dizzy symptoms during periods of stress.
In a calmer mind, there is less resistance; we are stronger, everything feels easier. When we have a busy mind, everything is harder.
Calm the mind, and we become more aware of our body and our environment around us. Our balance improves and our chances of falling will decrease.
It took me a long time to get into meditation myself to decrease stress. Once I began, stayed consistent and noticed results, I got hooked.
Consistency is the key to any mindfulness practice and 10 minutes is the perfect place to start.
I recommend 10 minutes of meditation each day from now on. You will still get improvements in balance without the meditation and by just doing the exercises; but if you want to make improvements in all areas of your life, this is a great tool to improve your health.
MINDFULNESS TECHNIQUES:
There are plenty of apps and guided meditations online.
Alternatively, here is a mindfulness technique you can use:
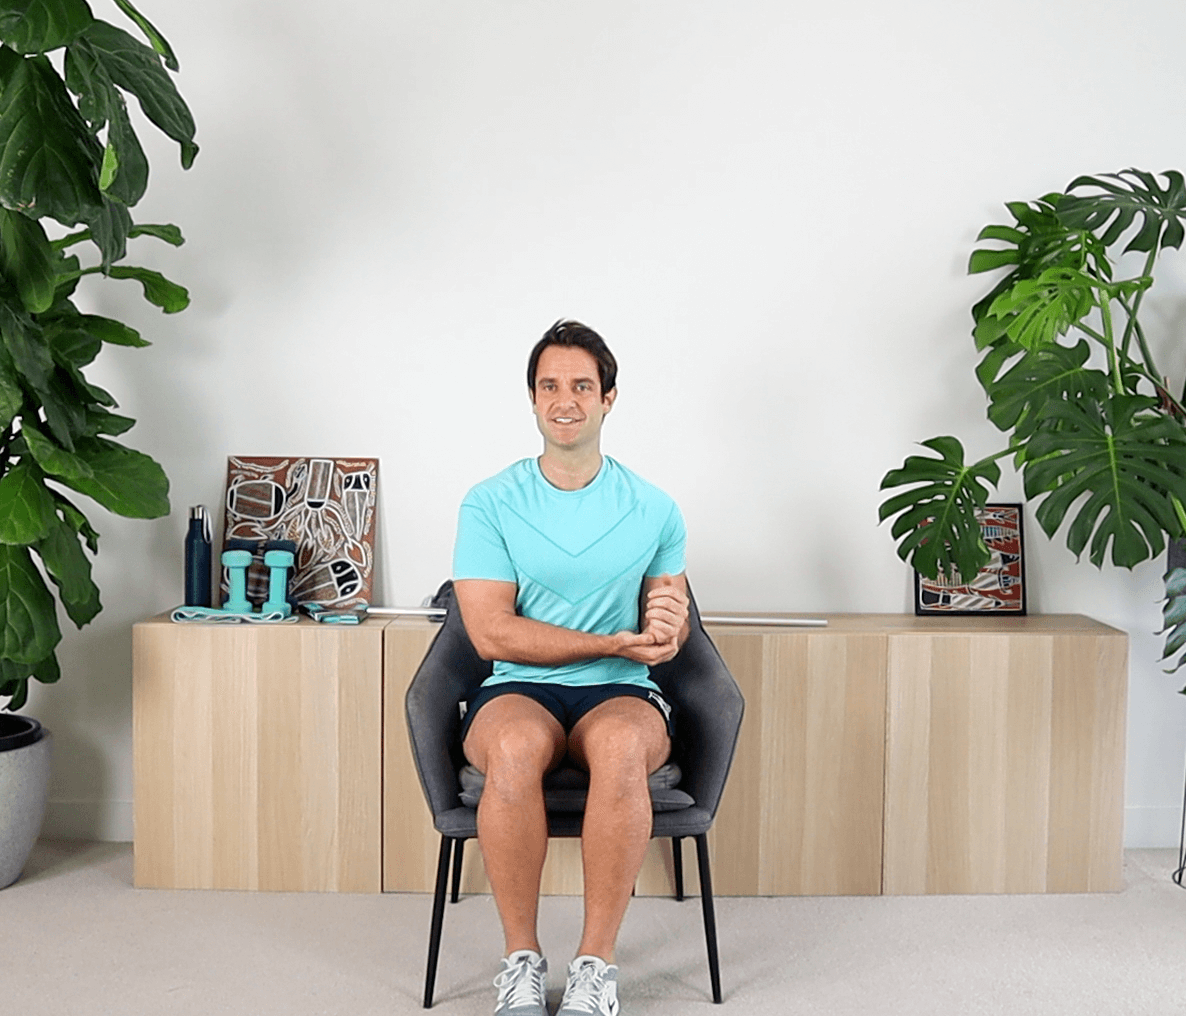
When alert, not sleepy, sit in a comfortable chair with your feet flat on the floor. Get comfortable but do not lay down. You don't want to fall asleep.
Set a timer for 5-10 minutes of undistracted time. No distractions, whatsoever. Complete focus. I meditate for 20-minute sessions, but when I first started, I did 10 minutes for quite some time. When you start seeing the benefits and enjoying meditation, you will want to increase the time you sit down.
Play soothing music or sit in silence during your session. A simple YouTube search can help with this.
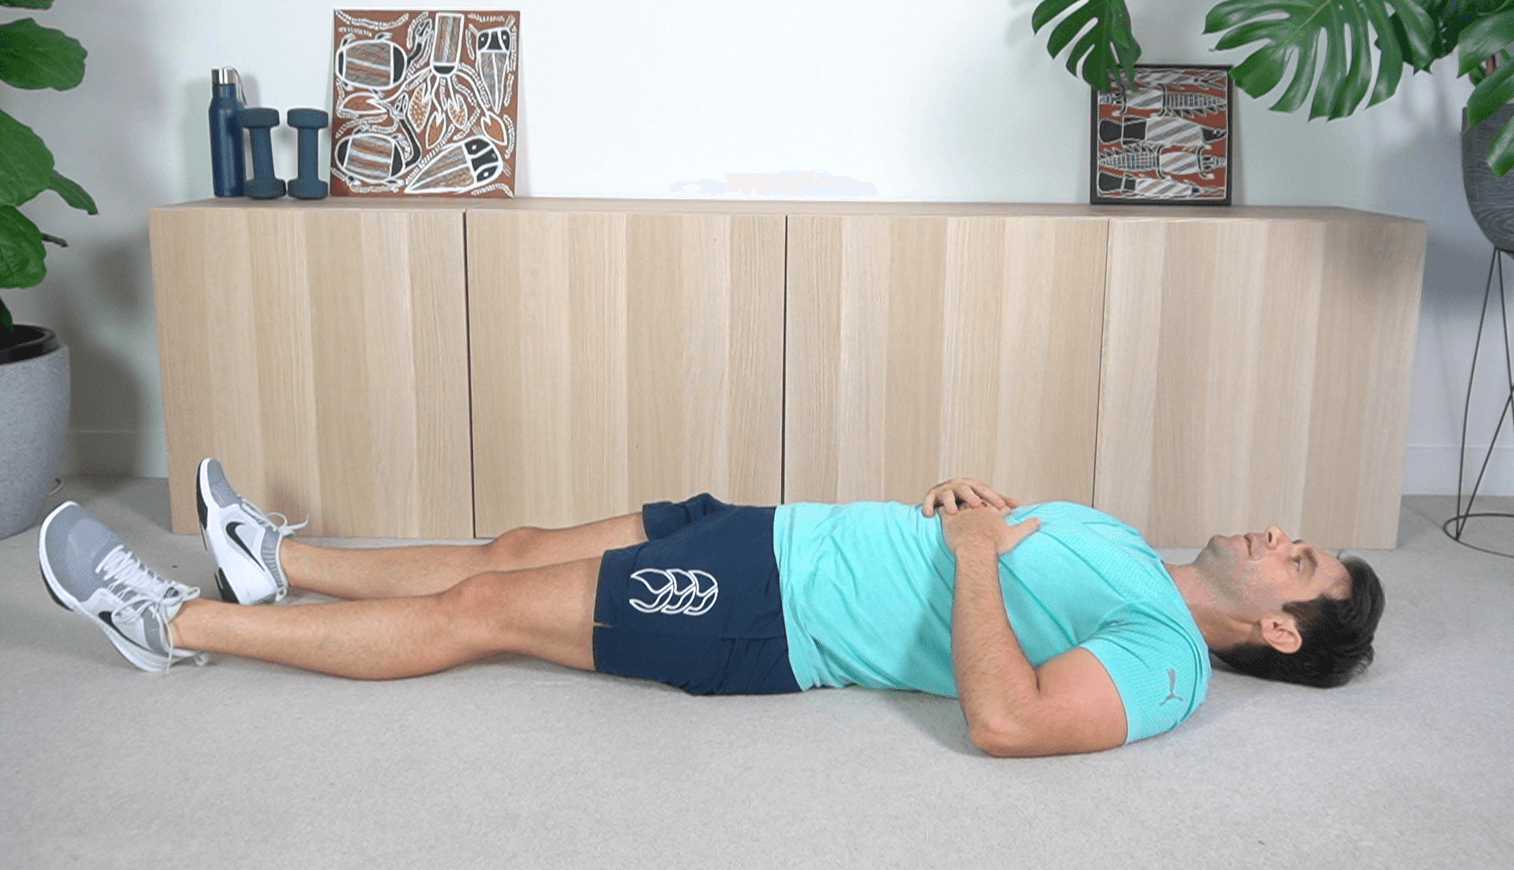
Ok, now you're ready to go. Start by taking a deep breath all the way in through the nose, and all the way out through the mouth. Repeat this five times with your eyes open
It's now time to close your eyes.
Now take slow controlled breaths in through the nose and out through the mouth. Nice and slow. Continue these slow, controlled breaths.
Continue to focus on the breath. Your mind will wander, this is ok. Do your best to bring your attention back to the body, focusing on relaxing all areas of your body and letting go of any tension or resistance.
Once you start to feel yourself relaxing, shift your focus to the top of the head and slowly move your attention all the way throughout the body, to your feet and back. Focus on relaxing each and every part of your body.
Repeat with the focus on your breath and relaxing all areas of your body for the time set.
Note: It does not need to be perfect. Don't worry if you are struggling. Sit in silence, relax and just enjoy the quiet time. Over time, you will get better.
If you are having a difficult time concentrating, spend the first couple of sessions (maybe a week) just sitting down in silence and processing your thoughts. Listen to them; let them go.
This whole process will get easier with consistency, so vow to make it a daily habit, and you WILL see the results.
ENDING NOTE
There we have it, the guide to improving your balance.
By incorporating all these strategies into your life, you'll begin seeing significant changes in your balance. Stay consistent with the exercises, and it won't be long before you have great balance and are doing more each day, getting more out of life and also decreasing your falls risk.
Good luck on your journey to better balance!
- Mike
SUMMARY TO IMPROVE YOUR BALANCE
To ensure you are on your way to great balance and to make sure you have covered everything, tick the boxes below when done.
🔲 Learn what's necessary to improve your balance.
🔲 Test your balance.
🔲 Include more physical activity in your daily life.
🔲 Perform balance exercises weekly (preferably daily) and make sure you follow along with my exercise videos.
🔲 Become more mindful daily.
🔲 Ensure you are eating and sleeping well.
🔲 Challenge yourself with your balance as you make progress, be patient and stay consistent.
Do you need to improve your balance?
Have you improved your balance by performing these exercises?
I’d love to hear from you.
Leave a comment below, or join the More Life Health Facebook Support Group.
SOURCES
TO VIEW ALL SOURCES USED IN THIS ARTICLE AND FOR ADDITIONAL RESOURCES, CLICK HERE.

25 Minute Full Workout - Arm, Leg & Cardio Exercises for Seniors
In this video, we go through arm exercises, leg exercises, and cardio (HIIT) for seniors all in one workout.
beginner to intermediate 25 Minute Exercises For Seniors
Follow along with me (Mike - Physiotherapist) for these arm, leg and cardio (HIIT) exercises for seniors all in one workout. No need to change over from the shorter workouts if you want a longer workout. It goes for 25-minutes, working your whole body.
It is of beginner to intermediate level, and we use hand-weights for some exercises. You can still do the exercises without hand weights.
In this video we cover:

Give this exercise a go and let me know how you went.
- Mike

Simple Leg Exercises For Stronger Legs
In this video, we go through a simple leg workout that you can do daily to strengthen your legs.
Daily Leg Exercises for Seniors
Follow along with me (Mike - Physiotherapist) for these leg exercises that you can do daily to strengthen your legs.
Strong legs are essential to good movement and preventing falls. By spending a short amount of time each day, you can get those legs strong and keep them strong, and you WILL feel the difference.
Here is a simple and short 7-minute new exercise video, to get you moving and your legs strong.
In this video we cover:
Give this simple leg exercise a go and let me know how you went.
- Mike

Beginner Seated HIIT Workout for Seniors (10 minutes)
In this video, we go through a beginner's style HIIT (cardio) workout to improve your fitness and also help with weight loss.
Low Impact Cardio Workout For Seniors
I want to remind you, that when it comes to exercise, there is no finish line.
Although you may not want to hear this, exercise is something you must do consistently to keep your body in the best physical condition.
To keep your body stronger it takes consistent strength exercises each week, or you may find your muscles becoming weaker.
To keep your body balancing well, requires movement and balance exercises or you may find yourself becoming more unsteady on your feet.
To keep your body fit, it takes exercise that gets your heart rate up, or you may find yourself becoming shorter of breath with less activity.
I could apply this to all the components of physical fitness, but in short, if you keep your exercise up, you’re going to get and keep, the benefits. If you don’t, you’re going to lose it!
On the topic of getting and keeping fit, I want to introduce you to a type of cardio known as High-Intensity Interval Training (HIIT).
“HIIT” workouts involve short periods of high(er) intensity exercise alternated with periods of rest or recovery.
By doing these types of workouts, you can get increased health benefits (such as increased fitness and weight loss) with less time spent working out.
This week, we are going to go through a beginner’s seated HIIT workout. Click below to get moving with me.
In this video we cover:
This is a beginner style HIIT workout, it only goes for 10 minutes, so give it a go and let me know how you went.
- Mike

Arm Exercises For Toned Arms
In this video, we cover these simple exercises you can do to build muscle in your arms, which will lead to stronger and more toned arms.
Exercise For Stronger and Toned Arms For Seniors
A couple of years back I received an email saying something along the lines of: “Hey Mike, what exercises should I do to get rid of my bat wings?”.
My first thought… “what the hell are bat wings and why does this lady have them?” 🦇
It didn’t take me long to work it out. ‘Bat wings’ were the name given to the back of the upper arms when there is a build-up of fat, making them flabby.
This was the first time I had heard of this. I had heard of ‘tuck shop arms’ before, but never ‘bat wings’.
Since then, I’ve heard it many times.. Apparently another name for this area is ‘bingo wings’.
Anyway…. whatever you refer to this area as, whether you’re a man or a woman, we all want stronger and more toned arms.
There are some simple exercises you can do to build the muscle in your arms, which will lead to stronger and more toned arms……. helping get rid of those bat wings.
Which is exactly what we go through today. Click below (or HERE), for a 10-minute video to strengthen and tone your arms.
In this video we cover:

When the exercises become too easy, you can increase the repetitions, or increase the weight of the hand weights you are using.
There is also an advanced exercise in this video, which is not for everyone but I give a modification if you can’t do it.
For another workout for toned arms. Click HERE.
- Mike

Daily Exercises For Healthy Shoulders
In this video, we cover these quick and simple exercises for stiff shoulders are for everyone to help with, and can also help prevent, stiff shoulders.
Daily Shoulder Exercises FOR SENIORS
Carrying on from the last video of specific exercises for frozen shoulders, these quick and simple exercises for stiff shoulders are for everyone to help with, and can also help prevent, stiff shoulders. It only goes for 5 minutes and can be done daily.
In this video, we do a neck stretch (to help loosen the neck if it is tight), and some gentle shoulder exercises.
This exercise video can be done by anyone, it’s quick and simple and if you like it you can add it to your playlist to do weekly.
For specific exercises for frozen shoulder. Click here.
In this video we cover:

Do your best and any questions ask below!
- Mike
THE 9 BEST EXERCISES FOR FROZEN SHOULDER FOR OLDER ADULTS
In this video, we cover the best exercises to help relieve pain and stiffness from Frozen Shoulder (Adhesive Capsulitis).
When you think of the shoulder joint, the joint you’d most probably be thinking of is the glenohumeral joint. The glenohumeral joint is the joint mainly responsible for moving the arm.
Adhesive capsulitis, or frozen shoulder, occurs when the shoulder capsule (the connective tissue surrounding the shoulder joint) becomes inflamed and therefore thicker which causes increased stiffness. “Itis” = Inflammation.
There are solutions to help with the pain and loss of range of motion with frozen shoulder, and certain exercises and stretches can be done to help with a more successful recovery.
Although these exercises are targeted for frozen shoulder, you can complete them for generalised stiffness of the shoulder also.
With these exercises, you want to stretch to the point of tension but not pain (a very small amount is ok).
Pre-Exercise Considerations
Before you jump into any new exercise routine, there's something super important to consider – chatting with your healthcare provider. Think of them as your personal coach. They'll help you figure out the best game plan and ensure you're doing exercises that are safe and effective for your specific situation.
Now, onto some tips for getting started safely with your exercises:
Warm-Up: Have you ever noticed how athletes warm up before a big game? That's because muscles perform better when they're warm. So, start with a gentle warm-up to get those shoulder muscles ready for action.
Start Slow: Think baby steps if you're just diving back into exercise. Start with simple, low-impact movements. You don't want to go from zero to hero and end up feeling sore or, worse, injured.
Listen to Your Body: Your body knows best. If something feels off or painful (and not in a 'good workout' kind of way), it's time to take a step back. Pain is your body's way of waving a red flag.
Stay Consistent: Consistency is key. It's like watering a plant – do it regularly, and you'll see it thrive. The same goes for your exercises. Regular movement can work wonders for easing that frozen shoulder.
Enjoy the Process: Last but not least, have some fun with it! Put on your favourite tunes, find a workout buddy, or exercise in your favourite part of the house. It's all about making the experience enjoyable.
There you have it – understanding Frozen Shoulder and getting ready to tackle it head-on with some safe exercises. Remember, you've got this, and your shoulders will thank you for it!
Top 9 Exercises for Frozen Shoulder in Seniors
For some more on frozen shoulder, including the exercises in written form.
In this video we cover:
Exercises For Frozen Shoulder - Adhesive Capsulitis exercises
Do your best and any questions ask below!
- Mike

Adhesive Capsulitis - The “Frozen Shoulder”
Adhesive capsulitis, more commonly known as “frozen shoulder”, is a condition characterised by pain, stiffness and an increased difficulty (or an inability) to lift the affected arm.
With frozen shoulder, what was once simple activities like over head, tucking in a shirt or doing up a bra can become impossible.
The good news is, frozen shoulder is not permanent. It does take some time (usually ranging from 9 months to 3 years) however, it will resolve itself and a full, functional recovery is usually made.
There are solutions to help with the pain and loss of range of motion with frozen shoulder.
In this article, we will take a look at what frozen shoulder is and what you can be doing to help this condition - including the best exercises (including a video) to help.
The Best Exercises For Frozen Shoulder
Adhesive capsulitis, more commonly known as “frozen shoulder”, is a condition characterised by pain, stiffness and an increased difficulty (or an inability) to lift the affected arm.
With frozen shoulder, what was once simple activities - like lifting something overhead, tucking in a shirt or doing up a bra can become very, very difficult.
The good news is, frozen shoulder is not permanent. It does take some time, usually ranging from 9 months to 3 years; however, it will resolve, and a full, functional recovery is usually made.
There are solutions to help with the pain and loss of range of motion with frozen shoulder, and certain exercises and stretches can be done to help with a more successful recovery.
In this article, we will look at what frozen shoulder is and the best exercises you can do (video included) to help with this condition.
CONTENTS OF ARTICLE:
A QUICK LOOK AT THE SHOULDER JOINT
Our shoulder is made up of three bones: Our clavicle (the collar bone), our scapula (the shoulder blade) and our humerus (the upper arm bone).

The three bones of the shoulder
Our shoulder also consists of two joints - the glenohumeral joint and the acromioclavicular joint.
When you think of the shoulder joint, the joint you’d most probably be thinking of is the glenohumeral joint. The glenohumeral joint is the joint mainly responsible for moving the arm.
The glenohumeral joint is a ball and socket joint. What that means is the end of the upper arm bone (the humerus) is shaped like a ball. The ball-shaped part of the humerus fits nicely into a shallow, cup-like socket of the scapula, known as the glenoid. Hence gleno (glenoid) - humeral (humerus) joint.
Where the humerus and scapula meet are covered with smooth, elastic cartilage, allowing for smooth movement.

The shoulder joint
The ball and socket mechanism allows for the variety of movements we can do with our arms. Compare this to the knee joint, which allows only a few movements.
The shoulder joint is encapsulated by connective tissue to protect and support it, known as the shoulder capsule.
WHAT IS ADHESIVE CAPSULITIS (FROZEN SHOULDER)
Adhesive capsulitis, or frozen shoulder - occurs when the shoulder capsule (the connective tissue surrounding the shoulder joint) becomes inflamed and therefore thicker which causes increased stiffness. “Itis” = Inflammation.
Frozen shoulder can arise spontaneously without a known cause, this is known as primary adhesive capsulitis or secondary which occurs with a known cause.
Secondary adhesive capsulitis can occur after a trauma/injury to the area, from a period of immobilisation, or a complication arising from shoulder surgery.
STAGES OF FROZEN SHOULDER
Adhesive capsulitis follows three stages:
The Freezing Stage - This is when the joint starts to stiffen.
In this stage, movement of the shoulder causes pain, and the range of motion of the shoulder begins to become limited.
The Frozen Stage - This is when the joint plateaus at its stiffest.
In this stage, pain eases. However, the shoulder stiffness increases, and it becomes more difficult to use the arm.
The Thawing Stage - This is when the shoulder starts to recover.
In this stage, the range of motion of the shoulder begins to improve.
RISK FACTORS FOR FROZEN SHOULDER
Frozen shoulder most commonly affects women over 40.
Other factors which increase the risk of a frozen shoulder is a long period of immobilisation of the shoulder joint. This could be from a past shoulder or arm injury, stroke, or recovery from surgery.
Certain diseases also increase the risk of frozen shoulder, including diabetes (as mentioned above), cardiovascular disease, hyper/hypothyroidism, Tuberculosis and Parkinson's disease.
SYMPTOMS OF FROZEN SHOULDER
The main symptoms of frozen shoulder are increased difficulty moving the arm, stiffness and pain. The pain usually worsens over time.
Common difficulties associated with frozen shoulder include:
Difficulty, or inability, reaching behind the back to put on a belt, tucking in a shirt, or doing up a bra.
Difficulty, or inability, reaching above shoulder height.
Difficulty, or inability, putting on a seatbelt or reaching to the side.
Inability grasping for something quickly.
Pain when sleeping or laying on your side.
One of the first indicators of frozen shoulder is commonly pain in the shoulder at night time.
NOTE: These symptoms may or may not be frozen shoulder, and a thorough assessment will be needed to determine your condition. If you have the above symptoms, see your Doctor or Physiotherapist.
WHAT TO DO FOR FORZEN SHOULDER FOR BETTER RECOVERY
Frozen shoulder usually resolves in nine months to three years.
In the initial stages, the freezing and the frozen stage, pain management may be required. Your doctor may recommend and prescribe anti-inflammatory medication and analgesia.
Analgesia can be combined with other methods of pain management.
Ice or heat can help with a flare-up of pain (IE you have overused the arm in some way aggravating the area).
Other pain management techniques could include gentle massage of the neck or shoulder or TENS (transcutaneous electrical stimulation), which is small, battery-operated device that reduces pain by sending small electrical signals.
To ensure a better recovery, it's important to also focus on restoring your body to the best health possible, which I touch on in many of my articles. Ways to do this include getting a better night's sleep, reducing stress and eating a healthier, nutrient-dense diet.
This will help improve the health of your body and decrease overall inflammation.
Additionally, exercises focused on improving the shoulder's range of motion and eventually strengthening the shoulder, and surrounding areas as pain levels improve should be the cornerstone of treatment.
We will now get to the best exercises for frozen shoulder and a video of exercises you can follow along to.
THE BEST EXERCISES FOR FROZEN SHOULDER - SHOULDER MOBILITY EXERCISES FOR SENIORS
With exercises for frozen shoulder, you want to stretch to the point of tension but not pain.
You do not want to aggravate the area, as aggressive stretching beyond the pain threshold can result in inferior outcomes, particularly in the early phase of the condition.
Using a heat pack on the area before doing these exercises will help warm up the area and loosen your muscles.
Note: Remember to consult your Doctor or Physiotherapist to ensure these exercises are appropriate for you. A physiotherapist can help you with specific exercises and apply manual treatments to assist in recovery. If these exercises cause an increase in pain or other symptoms, stop the exercise and make sure to speak to your Doctor or Physiotherapist.
NECK STRETCH
Neck muscles connect to the shoulder. It helps to stretch the neck muscles as this area can become tight and take on tension.
1. SIDE FLEXION NECK STRETCH


How To:
Sitting up tall in your chair, in good posture.
Bring your ear down to your shoulder as close as you can, keeping your face looking to the front.
You will feel the stretch in the opposite side of your neck.
You can increase the stretch by applying a gentle pressure with your hand on the side of your head.
Hold this position for 30 seconds and change sides.
SHOULDER RANGE OF MOTION EXERCISES
2. SHOULDER ROLLS


How To:
Sitting up tall in your chair, in good posture.
Bring your shoulders up back and around in a rolling motion
Complete this 5 times.
3. PENDULUMS


How To:
Standing next to a bench or behind a chair. Lean over as far as comfortable.
Relax your shoulders.
Allow your affected arm to hang down.
Swing the arm in a small circle — about a foot (30 centimetres) in diameter. You can hold a light weight (0.5-1kg) to increase the stretch.
Perform 5-10 revolutions in each direction.
Also swing your arm back and forth gently. Repeat 5-10 times.
As your symptoms improve, increase the diameter of your swing, but never force it.
4. ACTIVE ASSISTED SHOULDER FLEXION WITH WAND (LYING)
This exercise uses your unaffected arm or a stick (pipe or a piece of dowel - any light weight stick) for assistance.


How To:
Lay on a flat surface (the floor or a firm bed).
Keep your legs and arms straight.
Hold onto your stick in both hands, with your arm straight
Lift your arms vertically and backward as far as you comfortable can to the floor (towards your head and over) with the help of the unaffected arm.
Or, without the stick, use your unaffected arm to hold the elbow of the injured arm to help guide the arm towards the head or into the overhead movement.
Keep reaching until a stretch is felt.
Repeat 5-10 times.
6. ACTIVE ASSISTED SHOULDER EXTERNAL ROTATION WITH WAND (SEATED)


How To:
Similar to the previous exercise.
Sitting up tall in your chair with good posture, keep your elbows tucked in at your side at a 90-degree angle, holding onto your stick.
Rotate the affected arm out away from your body using the unaffected arm.
Repeat 5-10 times.
7b. WALL CRAWLS - FLEXION

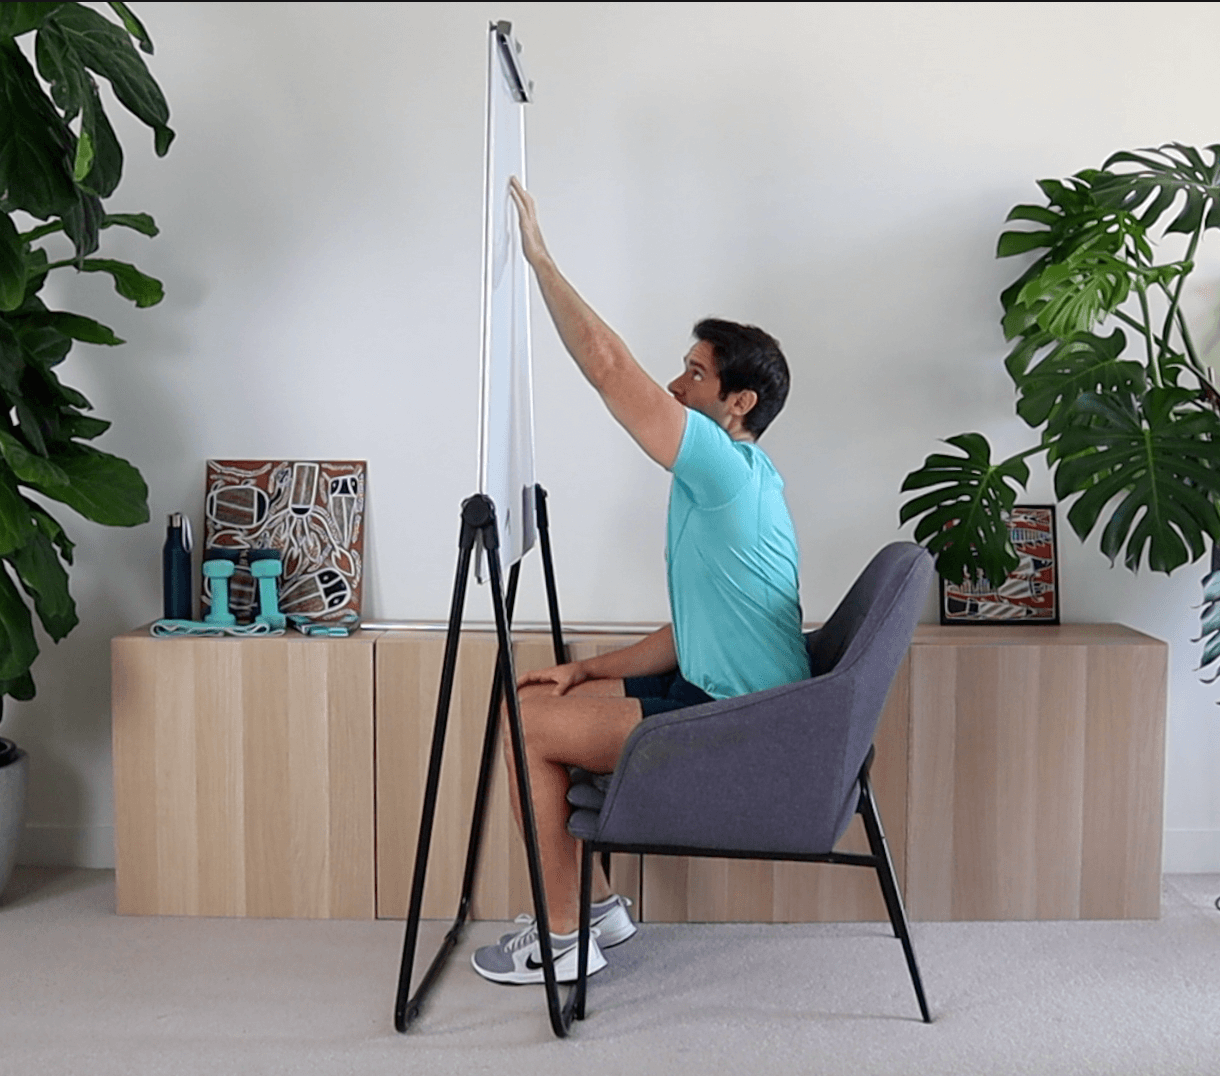
How To:
Face a wall.
Reach out and touch the wall, at the height you are able to, with the fingertips of the affected arm.
Keeping your elbow slightly bent, slowly walk your fingers up the wall like a spider. Use your fingers, not your shoulder muscles.
Do this until you've raised your arm to shoulder level or as far as you comfortably can.
Slowly lower the arm (with the help of the good arm, if necessary) and repeat.
Perform this exercise 5-10 times.
7c. FINGER WALL CRAWL - ABDUCTION


How To:
As per the previous exercise, this time, face side on to the wall.
Reach out and touch the wall, at the height you are able to, with the fingertips of the affected arm.
Keeping your elbow slightly bent, slowly walk your fingers up the wall like a spider. Use your fingers, not your shoulder muscles.
Do this until you've raised your arm to shoulder level or as far as you comfortably can.
Slowly lower the arm and repeat.
Perform this exercise 5-10 times.
8. TOWEL STRETCH
The ability to place a hand behind the back becomes difficult with a frozen or stiff shoulder. This exercise helps stretch the shoulder for movements reaching behind the back.
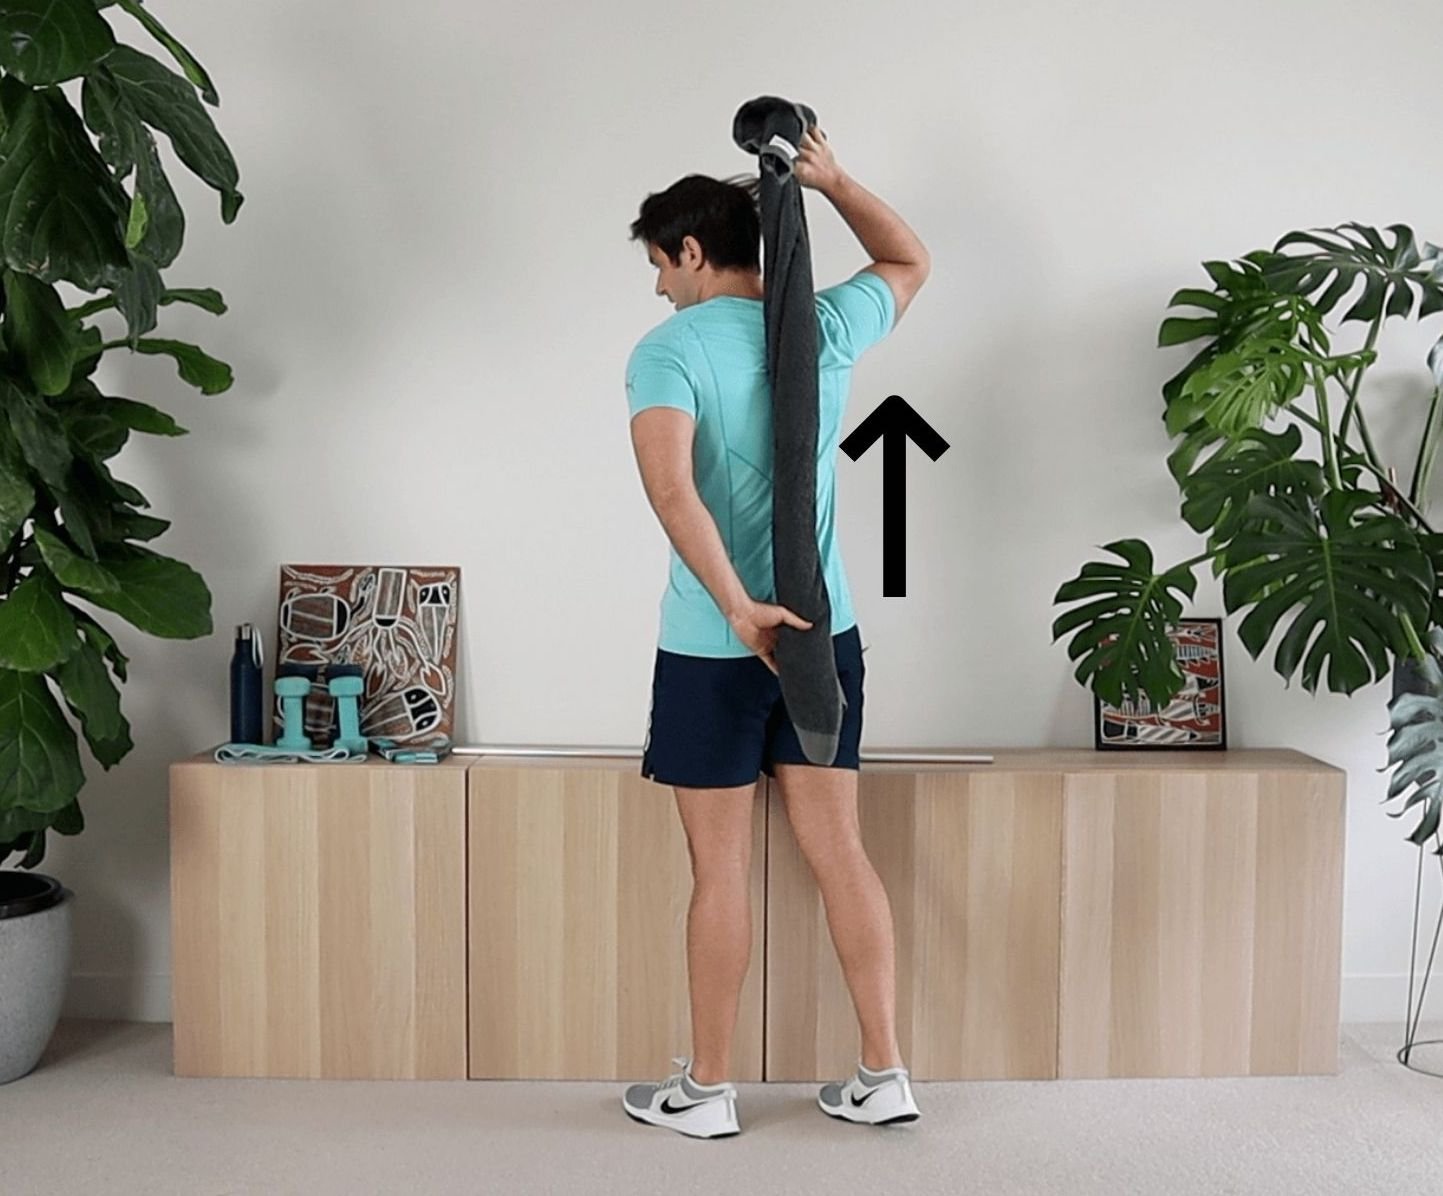
How To:
Holding onto a rolled-up towel on the unaffected side, bring your arm over your head so the towel hangs behind you.
Now grab the other end of the towel behind your back with your affected arm.
Use your good arm to gently pull up, allowing the affected side to feel a bit of a stretch.
Hold for 10 seconds and repeat for 2-3 sets. Increase the time as you are able to.
9. POSTERIOR CAPSULE STRETCH


How To:
Sitting up tall in good posture.
Place your arm on your opposite shoulder, use your unaffected arm to lift your affected arm at the elbow, and bring it up and across your body.
Apply gentle pressure to stretch the shoulder.
Hold the stretch for 30 seconds.
SHOULDER STRENGTHENING EXERCISES
10. SCAPULA RETRACTIONS
This exercise gently stretches the front of the body (chest muscles) and is a basic strengthening exercise for the scapular muscles.

How To:
Sitting up tall in your chair, in good posture.
Squeeze your shoulder blades together and hold for 5 seconds.
Repeat for 5 times.
11. ISOMETRIC SHOULDER EXTERNAL ROTATION
This will help strengthen the shoulder muscles.
How To:
Sitting up tall in your chair, in good posture.
Keep the elbow of your affected arm tucked in at your side and at a 90-degree angle.
Now place your hand of the unaffected arm on the wrist of the affected arm
Apply a gentle pressure inwards on the unaffected arm and resist with the affected arm pushing out, keeping the arm in position.
Hold this for 5-10 seconds.
Repeat for 5 times.
FROZEN SHOULDER EXERCISES FOR SENIORS - SHOULDER RANGE OF MOTION EXERCISES (VIDEO)
DAILY SHOULDER EXERCISES VIDEO
SOURCES
1. Adhesive capsulitis of the shoulder: review of pathophysiology and current clinical treatments https://www.ncbi.nlm.nih.gov/pmc/articles/PMC5384535/2. Upper extremity: emphasis on frozen shoulder https://pubmed.ncbi.nlm.nih.gov/17141009/3. Physical therapy in the management of frozen shoulder. https://www.ncbi.nlm.nih.gov/pmc/articles/PMC5917053/
5 Best Exercises For Lumbar Spinal Stenosis
In this video, we cover the best exercises to help relieve pain associated with lumbar spinal stenosis.
Exercise Routine For Lower Back Pain
Follow along with me (Mike - Physiotherapist) for these 5 best exercises to help relieve pain associated with lumbar spinal stenosis.
Although this video is made specifically for those with spinal stenosis, they are still great exercises for your lower back. So why not give them a go!
If the amount of repetitions is not enough for you, you can add in some more.
If you have spinal stenosis (or back pain), make sure to build up the repetitions gradually over time. You do not want to overdo it.
For more on spinal stenosis, make sure to read my article: All about spinal stenosis & what you can do about it.
In this video we cover:

Do your best and any questions ask below!
- Mike
All About Spinal Stenosis & What You Can Do About It!
The word “stenosis” is used in medicine to describe a narrowing of a passage of the body.
In spinal stenosis, as you may have already guessed, the narrowing is of an area of the spine.
The symptoms associated with this condition can make daily life difficult. However, it’s important to understand that chronic pain (and other chronic symptoms) are usually caused by multiple factors. NOT solely from the diagnosed issue itself (in this case, spinal stenosis).
There are also many effective treatments available.
By taking the right steps and seeking the right Health Professionals, YOU CAN GET RELIEF!
Relieving Spinal Stenosis
(Includes Best Exercises For Spinal StenosiS)
The word “stenosis” is used in medicine to describe a narrowing of a passage of the body.
Spinal stenosis, as you may have already guessed, is the narrowing of an area of the spine.
Spinal stenosis is a condition that can more commonly affect those over 60. It can lead to various symptoms, including lower back pain, weakness in the legs or arms, numbness in the buttocks or legs, or balance and mobility issues.
The symptoms associated with this condition can make daily life difficult. However, there are many effective treatments available and by taking the right steps, YOU CAN GET RELIEF!
In this article, we are going to look at spinal stenosis and what you can do about it! (including exercises, with an exercise video that will help).
WHAT’S COVERED IN THIS ARTICLE:
Note: Do not self-diagnose based on the information in this article. If you are experiencing any of the symptoms discussed in this article, make sure you see your Doctor or Physiotherapist before coming to any conclusions.
UNDERSTANDING SPINAL STENOSIS (TO BRING RELIEF)
ABOUT OUR SPINE
To better understand spinal stenosis, a little knowledge of the spine is needed. Let’s take a look at that now.

The Regions of the Spine
Our spine is a strong structure that supports our upper body. It keeps us upright and standing straight.
It’s also a flexible structure that allows certain movements. It can bend forward (flexion), bend backward (extension), twist to each side (rotation) and bend to each side (lateral flexion).
Our spine comprises 29 smaller bones that run from our neck to our pelvis (to the tail bone).
There are seven bones in the cervical region (the neck), twelve in the thoracic region (the upper back), five in the lumbar region (the lower back) and five bones, which are fused (and don’t move), in the sacral region (the pelvis).
These bones are called vertebra or vertebrae (plural).
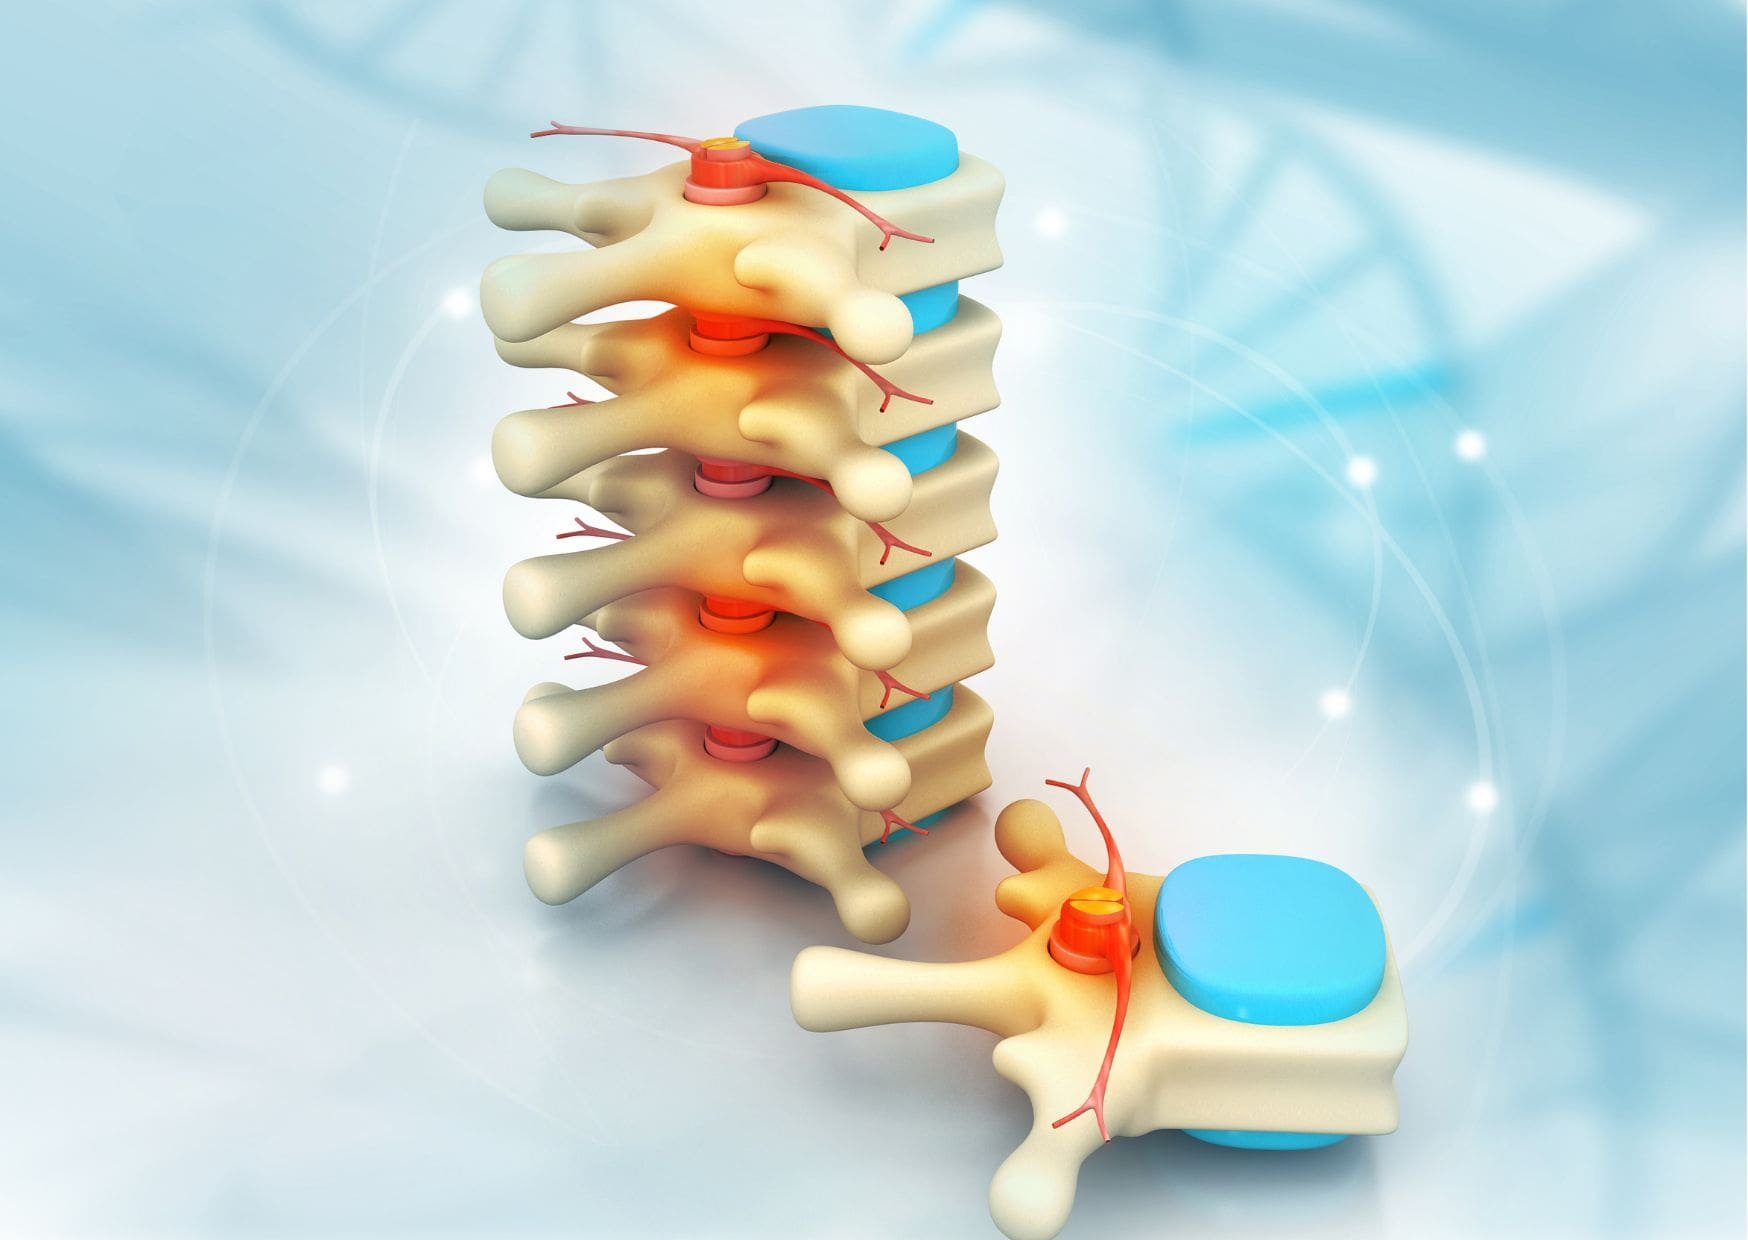
Between each of our vertebrae are intervertebral discs which act as little cushions and provide shock absorption.

Vertebrae, Intervertebral discs and spinal cord
The intervertebral discs also allow our spine to move.
In the middle of our spine, a column of nerves runs through these bones. This column of nerves is our spinal cord. The space in which the spinal cord sits is known as the foramen.
The spinal cord is quite delicate and it is protected by the surrounding vertebral bone and other tissues.
Nerves of the spinal cord branch off at every level of the vertebrae to allow signals from the brain to reach the rest of the body.
ABOUT SPINAL STENOSIS
Throughout life, changes to the spine can occur for various reasons.
These changes can cause the spaces the spinal nerves pass through to become narrowed (aka spinal stenosis).
Any narrowing where the nerves pass through can pinch the nerves leading to pain and neurological symptoms that can affect walking, balance and sensation, and cause paralysis.
Spinal stenosis can happen in any part of the spine but most commonly occurs in the lumbar and cervical regions.
Lumbar stenosis is the most common type of spinal stenosis.
CAUSES OF SPINAL STENOSIS
Changes to the spine that cause spinal stenosis are:
OSTEOARTHRITIS
Over the years, our joints experience wear and tear, otherwise known as osteoarthritis. Osteoarthritis is the most common cause of spinal stenosis.
Osteoarthritis can cause the spaces the nerves pass through (the foramen) to become narrowed.
The wear and tear can also lead to abnormal bone growth, called osteophytes or bone spurs, which can cause narrowing of the foramen and put pressure on the nerves.
INTERVERTEBRAL DISC ISSUES
Additionally, as we get older, the discs between our vertebrae lose height and become dehydrated (this is why we lose height as we age).
As the discs become thinner, there is now increased pressure on the spinal joints, and it can also lead to narrowing of the foramen.
The intervertebral discs can also bulge, pushing into the spinal canal, leading to spinal stenosis.
LIGAMENT THICKENING
Another cause of spinal stenosis is a thickening of the spine's ligaments, caused by osteoarthritis and inflammation. [1]
SYMPTOMS OF SPINAL STENOSIS
With spinal stenosis, the symptoms vary between each person.
The most common symptom is pain radiating down the legs. This pain is usually felt in both legs but can occur in only one.
The pain is usually aggravated when hyper-extending the back (leaning/bending backwards). See diagram below.

Position of most pain - extending.
Additionally, prolonged walking or standing also commonly increase the symptoms.
Other common symptoms of spinal stenosis are numbness and weakness in the legs, which can lead to balance and mobility issues.
On the other hand, certain positions relieve pain, which is characteristic of spinal stenosis.
Bending forward relieves the pain (e.g. leaning forward on a table when standing, or a shopping trolley, or walking aid, when walking).
HOW IS SPINAL STENOSIS DIAGNOSED
If you are experiencing any symptoms discussed above, see your doctor or Physiotherapist for an appropriate assessment and diagnosis.
Your doctor may order medical images/scans (X-ray and/or MRI).
As mentioned at the beginning of this article, there is no direct link between the severity of stenosis seen on medical imaging and symptoms. One may have severe stenosis on scans and no pain, and another can have mild stenosis on scans and severe pain.
How is this possible? Because scans CANNOT tell you what is causing your pain. Pain is caused by a variety of reasons.
Scans can, however, give an idea of what is going on in your back, which helps with recovery.
Therefore you mustn't get too caught up in the results of your scans or the diagnosis of spinal stenosis. Instead, turn your attention to applying what's required to remedy your pain.
I cover medical imaging and beliefs around pain in detail in my articles on chronic pain. You can find all these articles HERE. In Part 1 of my Pain Series articles - Pain is More than Meets the Eye we look at pain from a different angle and Part 2: The Real Causes of Pain - I demonstrate, backed with studies, that what is identified on scans is not the sole cause of your pain.
Once you have an idea of what is causing your pain, your doctor will help you decide on the appropriate treatment. A conservative, exercise and lifestyle-based approach is usually the first line of treatment for spinal stenosis.
Now let's get to what you can do to help bring relief from spinal stenosis.
GETTING RELIEF FROM SPINAL STENOSIS
We have now covered that multiple factors contribute to pain and other symptoms in spinal stenosis and other chronic, painful conditions.
I discuss these factors that usually contribute to chronic pain and other symptoms in more detail in my article: “Overcoming Pain - Empty Your Cup” - (click to read).
When symptoms from spinal stenosis are increased, the best solution is to rest and avoid what is aggravating them.
At these times, management techniques can help also. These techniques include analgesia (speak to your doctor about this), heat packs, heat rubs/creams, cryotherapy (ice), herbal remedies, TENs (Transcutaneous Electrical Stimulation), ultrasound, acupuncture, cupping, stretching, amongst many others.
Rest and analgesia are not long term solutions and will eventually lead to further issues.
Exercise, along with other lifestyle changes, on the other hand, are long term solutions!
A gradual return to movement and activity is necessary as symptoms improve.
Additionally, other factors such as changing your views surrounding pain, shifting your focus on leading a healthier life, reducing stress, sleeping better, eating healthily, getting moving/exercising and doing specific exercises (covered in the next section) will help you overcome your symptoms.
I discuss lifestyle changes in more detail in my article “Overcoming Pain - Empty Your Cup Article”. And, In Part 4 of the Pain Series articles, “Overcoming your pain”, make sure to check them out.
The articles I have linked to above will give you new ways to think about your pain and solutions to begin living a healthier life and help bring relief from your spinal stenosis.
There are also many health professionals and clinics that can help you with your condition. So speak to your doctor or Physiotherapist or seek the right Health Professional for you who can help.
Being in pain/suffering is NOT a normal part of aging. There are many things you can do to help bring relief. You do not have to put up with the symptoms of spinal stenosis.
EXERCISING TO IMPROVE SPINAL STENOSIS
When in pain, the urge may be to avoid exercise altogether. In the beginning or during a flare-up of symptoms, this is ok.
However, exercise and movement are vital to manage and help overcome spinal stenosis (and any painful, chronic condition). This will ensure you remain moving well and your muscles and joints stay strong and flexible.
I recommend seeing a Physiotherapist if you are experiencing symptoms from spinal stenosis (or any back pain for that matter) as they can determine what physical issues could be contributing to your pain and develop an individualised exercise program for you.
They will also teach you specific exercises, ensure you are doing them correctly, keep track of your progress and modify your exercises where need be.
EXERCISES THAT MAY AGGRAVATE SPINAL STENOSIS
Avoiding any body movements can lead to further issues - such as increased stiffness and weakness.
However, with all painful conditions, there may be specific movements at times that will aggravate your pain, especially when symptoms are increased.
As discussed earlier, extension movements, movements leaning backwards, are common positions that cause pain with spinal stenosis.
I am demonstrating some movements in the extension position in the pictures below.

Seated lumbar extension

An increased lumbar extension stretch - Hyperextension
On the other hand, flexion movements (covered in the next section) will help ease your symptoms of spinal stenosis.
Also, stretches in standing may increase symptoms. Seated or lying stretches may be better.
Other activities that may aggravate symptoms of spinal stenosis are strengthening exercises (free weights), other high-impact exercises (for example, dancing, jogging or certain sports) and long walks (longer distances and time).
Although you may need to avoid, limit or modify certain exercises or activities initially, it does not mean you have to avoid them for good. These activities and exercises mentioned above bring many health benefits.
Free weights can be an excellent tool for a stronger body and help with back pain, provided they are performed correctly, and you have a clearance from your doctor or Physiotherapist.
Walking is another excellent form of exercise, and exercise everyone should be doing as they are able. Start with shorter, gentle walks before progressing. For more on this, make sure to check out my article on walking HERE.
It is important to have a healthy outlook on your pain. Aim to return to your previous levels of activity, and then eventually moving beyond that and doing more types of exercise as your symptoms and movement improve over time.
EXERCISE CHOICES FOR SPINAL STENOSIS
There are always alternate exercise options if you cannot do certain activities or exercise due to your pain or other symptoms.
One of those options is swimming or exercising in water (hydrotherapy).
Although swimming puts you in a more extended position, most people experience less or even no symptoms due to the non-weight bearing, low impact nature.
Swimming allows you to exercise your body with decreased stress/impact.
Additionally, if you are having difficulty doing exercises due to pain, exercising in water (known as hydrotherapy) can allow you to exercise your body without increasing symptoms due to your increased buoyancy (or decreased weight-bearing) in the water.
Furthermore, heated pools can help relax muscles and reduce pain, which will make the exercises more manageable and allow a greater range of movement compared to when out of the water, leading to more benefits.
After some time exercising in water, land-based exercise will begin feeling easier.
Other types of exercise that may help with your pain include smaller walks (building this up over time), yoga, pilates, or riding a stationary bike.
BEST EXERCISES FOR SPINAL STENOSIS
5 BEST EXERCISES FOR LUMBAR STENOSIS
Here are the best exercises you can do to help bring relief from your symptoms of spinal stenosis. There is an exercise video in the next section, which you can follow. The video will make it all easier.
If you have trouble getting up or down off the floor, I recommend doing these exercises on a firm bed.
Aim to complete these exercises once per day.
Go at your own pace and repeat for the repetitions stated below.
As you continue with the exercises, gradually increase the repetitions, time and sets over time.
Note: Remember to consult your Doctor or Physiotherapist to ensure these exercises are appropriate for you. If these exercises cause an increase in pain or other symptoms, stop the exercise and make sure to speak to your Doctor or Physiotherapist.
1. KNEE TO CHEST FLEXION STRETCH (DOUBLE)

How To:
Lie on your back, with your body comfortable and relaxed.
Bring both your knees to your chest and hug them, keeping your spine relaxed throughout.
Hold this position for 10 seconds and then slowly lower the legs.
Repeat 5 times.
2. SINGLE KNEE TO CHEST FLEXION STRETCH


How To:
Similar to the exercises above, this time drawing one leg up at a time.
Lie on your back, with your body comfortable and relaxed and legs extended.
Bring one knee to your chest and then bring it closer to your chest by placing your hands either at the back of the thigh or just below the knee.
Hold this position for 5 seconds and then slowly lower the leg, and alternate legs.
Repeat 5 times each side.
3. LUMBAR ROTATIONS


How To:
Lie on your back, with your arms by your side and with your knees bent at 90 degrees,.
To begin keep both feet flat against the floor.
Slowly rotate the knees to the left side as far as you can, then slowly rotate the knees to the right side.
The soles of your feet will lift off the ground when doing this exercise.
Repeat this for 5 repetitions each side.
4. BRIDGE
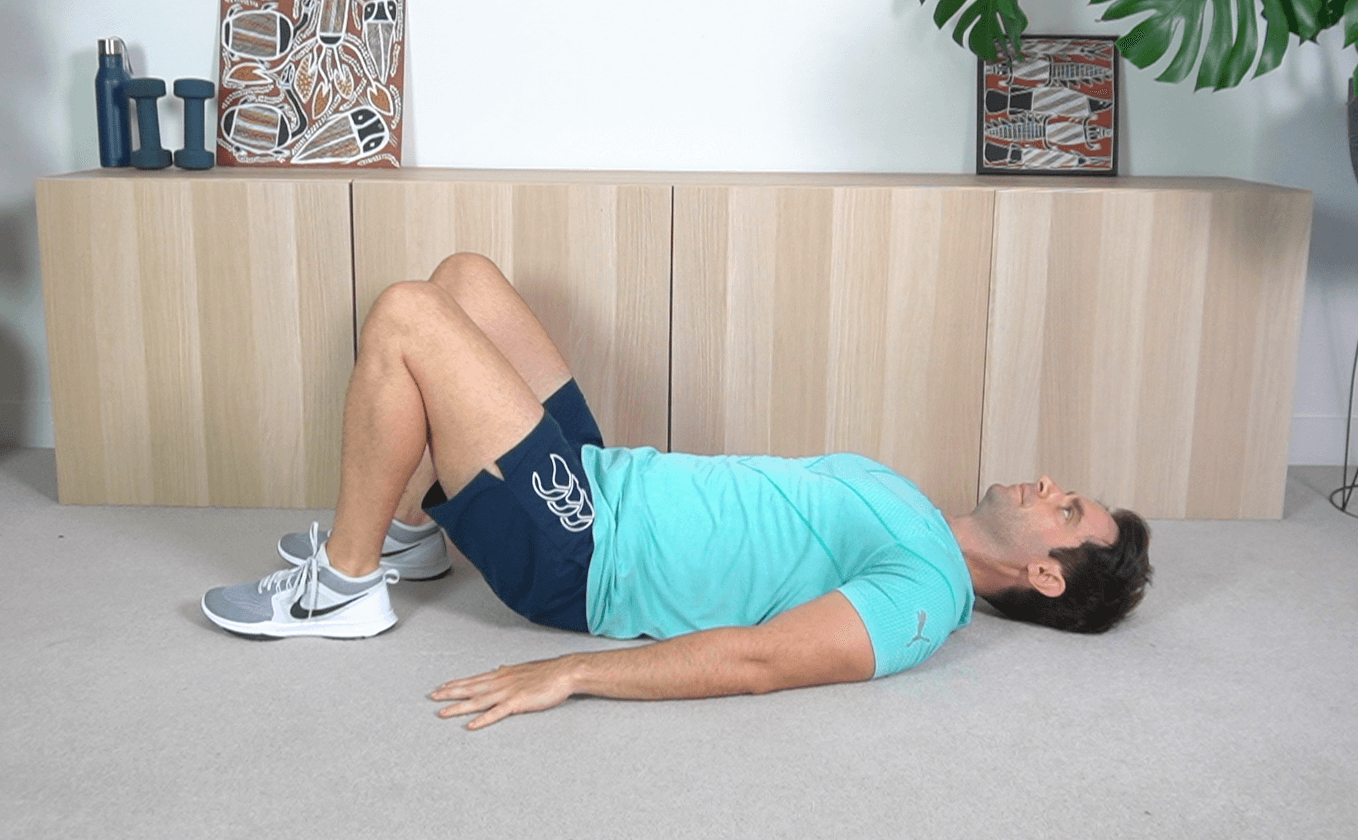

How To:
Lie on your back with knees bent at 90 degrees , your arms by your side and palms against the floor.
Squeeze your buttocks and raise the hips off the ground to bring the torso into a straight diagonal line.
Hold this position for 5 seconds then slowly lower your bottom back to the ground.
Repeat 5 times.
5. SEATED LUMBAR FLEXION

How To:
Sit in a firm chair with both feet on the floor.
Slowly bend yourself forward and reach towards the floor.
Hold the fully bent position for 5 seconds.
If you need to increase the pressure, hold your ankles and move into the stretch a little more.
After holding for 5 seconds, release and return to the full, upright seated position.
BEST EXERCISES FOR LUMBAR STENOSIS (VIDEO)
3 BEST EXERCISES FOR CERVICAL STENOSIS
Exercises for cervical spinal stenosis also work to improve the strength and flexibility of the neck and upper back.
Here are some upper back and neck exercises for spinal stenosis.
1. BACKWARD SHOULDER ROLLS
How To:
Sitting up nice and tall in your chair with your feet flat on the ground.
Lift your shoulders up toward your ears and then roll them back and down.
Now relax into the starting position.
Repeat this rolling motion.
Complete for 10 repetitions.

2. SEATED SHOULDER SQUEEZES

How To:
Sitting upright in your chair in good posture.
While seated, draw your shoulder blades together, hold for a second or two, and then lower back to the start position
Repeat for 10 repetitions.
3. CHIN TUCKS


How To:
Sitting upright in your chair in good posture
Maintaining this upright posture retract your chin out and slowly tuck your chin all the way in.
Do not move your head up or down during this movement.
Ensure you maintain the upright seated posture
Repeat for 10 repetitions.
SOURCES
Spinal Stenosis. https://www.ncbi.nlm.nih.gov/books/NBK441989/

Simple Breathing Exercises For Seniors | Improve Your Breathing
In this video, we cover breathing exercises for seniors which you can do to help you improve your breathing.
5 Simple Breathing Exercises For Seniors
Join me (Mike - Physiotherapist) for this exercise video where we do 5 simple breathing exercises which you can do to help you improve your breathing.
Healthy lungs are essential for optimal functioning through all stages of life, but, just like all areas of the body, our lungs are not immune to changes as we get older.
However, when we get a better understanding of our lungs and our respiratory system and what can happen through the years, we can take charge of our health and do what’s necessary to improve the health of our lungs.
There are many things that you can be doing, right now, to improve your lung health.
Click HERE for my most recent article on improving lung health over 60!
In this video we cover:
Do your best and any questions ask below!
- Mike

Better Breathing: Improving The Health of Your Lungs Over 60
Healthy lungs are essential for optimal functioning through all stages of life, but, just like all areas of the body, our lungs are not immune to changes as we get older.
However, when we get a better understanding of our lungs and our respiratory system and what can happen through the years, we can take charge of our health and do what’s necessary to improve the health of our lungs.
There are many things that you can be doing right now to improve your lung health.
So today, we will do exactly that! We are going to go through everything you need to improve the health of your lungs!
THE KEYS TO HEALTHY LUNGS FOR SENIORS (INCLUDES BREATHING EXERCISES)
Our lungs! An amazing and hard-working organ!
With each breath of air we take in, our lungs extract the oxygen we need to fuel our body. With each breath out, our lungs expel carbon dioxide, a waste product of the cells of our body doing their work.
Healthy lungs are essential for optimal functioning through all stages of life, but, just like all areas of the body, our lungs are not immune to changes as we get older.
However, when we get a better understanding of our lungs and our respiratory system and what can happen through the years, we can take charge of our health and do what’s necessary to improve the health of our lungs.
There are many things that you can be doing, right now, to improve your lung health.
So today, we are going to go through everything you need to do this.
In this article, we will look at how the lungs work, we will cover how our lungs change as we get older and look at a few lung conditions that are more common as a result of aging.
We will then go through what to do right now to improve your lung health (and your overall health). We will cover, in detail, exercising for better lung health (in general and with a lung condition). Finally, at the end of the article, we will go through some specific breathing exercises (with a video you can follow along to) to help improve your lung health and breathing.
CONTENTS:
NOTE: Try not to skip any parts of this article. Doing what’s important for your health does take more time and effort, but the results are ALWAYS WORTH THE EFFORT. So, take the time to read this article from start to finish, and, if you know anyone who would benefit from this article, make sure to send it on.
Now, let’s begin!
HOW YOUR LUNGS WORK
To understand what can happen to your lungs as you get older and what you can do to keep your lungs as healthy as possible, we will look now at the lungs and how they work in a bit of detail.
Our lungs serve two main functions. 1) To take oxygen in the air we breathe and circulate it around the body, which is vital for all cells, and 2) remove waste gases (carbon dioxide) from the body. This process is vital for life.
I’m sure you know we have two lungs: The right lung and the left lung.
When we take a breath in, the air moves down our trachea (windpipe) into the bronchi, which is the first branch of the trachea. The bronchi allow air to move both in and out of the right and left lungs.
THE LUNGS (RESPIRATORY SYSTEM)
The bronchi divide into increasingly smaller branches, known as the bronchioles. At the end of each bronchiole, there are clusters of microscopic, balloon-shaped air sacs, known as alveoli.
[For a better understanding see the diagram above of the respiratory system].
As we breathe, oxygen from the air is absorbed into the blood. The now oxygen-rich blood flows to the heart and is pumped to each cell, for fuel, throughout the body. As the cells of our body do their work, carbon dioxide, made by the cells, moves into the blood and returns to the heart.
The heart then pumps this carbon dioxide-rich blood to the lungs, passing into the alveoli, which then travels back out the trachea and is exhaled through the mouth or nose.
Our lungs expand with inhalation, as the alveoli fill with air and shrink with exhalation as carbon dioxide is expelled.
You’d most probably assume that the lungs contain muscles to aid in this expansion and contraction. This is not the case! Our lungs contain no muscles.
However, a strong, dome-shaped muscle is beneath the lungs known as the diaphragm. The diaphragm is the primary muscle that aids in the expansion and contraction of the lungs when we breathe, and separates our chest and abdominal cavities.
Additionally, other accessory respiratory muscles (of the abdomen and ribcage) aid the diaphragm in inspiration and expiration.
Our lungs are also supported and protected by our rib cage, which moves slightly to help our lungs expand and contract.
WHAT HAPPENS TO OUR LUNGS AS WE GET OLDER
Our lungs reach full maturation and function around the age of 20-25. [1]
After this, there is a slow, gradual decrease in the function of our lungs and respiratory system due to the normal changes of aging.
These changes occur to the lungs themselves, the muscles and bones which assist our breathing, and a decrease in immune system function over the years can also cause lung issues.
CHANGES TO THE RESPIRATORY SYSTEM WITH AGING:
CHANGES TO THE LUNG
The alveoli (air sacs) become larger and lose elasticity (decreased elastic recoil during inhalation/exhalation). [2]
CHANGES TO THE MUSCLES (AND OTHER SOFT TISSUES)
The diaphragm weakens.
The accessory respiratory muscles weaken and may stiffen up.
Other soft tissues can also weaken and become stiffer causing increased stiffness of the chest wall.
CHANGES TO THE BONES
Bones become thinner and change shape. Due to this, the ribcage can’t expand and contract as efficiently during breathing.
CHANGE TO THE IMMUNE SYSTEM
Our immune system’s function decreases with age, leading to an increase in inflammation, making it more difficult for the body to fight lung infections. [3, 4]
These changes, combined with being frequently exposed to many environmental toxins over the years (i.e. respiratory infections, air pollution, occupational dust/chemicals, smoke etc.), can take their toll on our lungs. Our lungs become less efficient and more susceptible to inflammation and infection. [5]
Although this may all sound a little worrisome, the changes are mostly natural, are gradual over the years and also subtle. It will only be when exercising that you will notice a difference, such as a decrease in fitness (increased shortness of breath or muscle fatigue) when exercising.
The changes of the lungs described above CAN BE IMPROVED IN SOME WAY, NO MATTER YOUR CONDITION RIGHT NOW! Which we will get to in the upcoming sections.
[If you notice sudden changes with your breathing, however, this includes increased shortness of breath (even when resting), or you are having difficulty keeping up with people your age, or you have persistent respiratory symptoms (for example - a cough that won’t go away) - make sure to see your doctor].
Before we get into what you can do to improve your lung health, let’s now go through some lung conditions in seniors. As I know, some of you reading this may have these conditions.
COMMON LUNG CONDITIONS OVER 60

Lung conditions can occur and do become more common as the years go on. These conditions can make it difficult to function each day.
There are many conditions that can affect the lungs, too many for me to cover them all in this article, however, here are some more common lung conditions that can occur in seniors:
ASTHMA
Asthma is when the lungs’ airways become inflamed and narrowed to the point that breathing is difficult.
Asthma is characterised by difficulty breathing, a dry hacking cough, wheezing and a tight chest.
This narrowing of the airways in asthma is reversible and those with asthma can lead a normal, active life with a healthy lifestyle and proper treatment.
BRONCHITIS (ACUTE)
Acute bronchitis is an infection, that lasts less than three months, of the lining of the bronchial tubes.
Acute bronchitis is usually caused by a viral infection (cold or flu) or sometimes by a bacterial infection.
The most common symptom of bronchitis is a productive cough (brings up mucus). Coughing can become constant and turn into wheezing or difficulty breathing.
CHRONIC OBSTRUCTIVE PULMONARY DISEASE (COPD)
An umbrella term for the lung diseases emphysema and chronic bronchitis.
EMPHYSEMA
In emphysema, the walls between many of the alveoli (air sacs) are damaged. As a result, the alveoli lose their elasticity and shape and become baggy.
This damage can also destroy the alveoli walls, leading to fewer and larger alveoli instead of many tiny ones, reducing the amount of airflow into the lungs and even more so the amount out.
Shortness of breath is the main sign of emphysema. At first, it may be only after exercise. Eventually, it can happen at rest.
CHRONIC BRONCHITIS
In chronic bronchitis, the lining of the airways stays constantly irritated, inflamed and swollen (longer than three months). This leads to thick mucus forming in the airways, making breathing difficult.
Most people who have COPD have both emphysema and chronic bronchitis. However, due to the difference in the severity of each condition from person to person, the general term COPD is used.
COPD Is progressive and is usually caused by smoking (or passive smoke) or exposure to other lung irritants such as air pollution, chemical fumes, or dusts.
PNEUMONIA
Pneumonia is an infection of one or both of the lungs. The infections are usually caused by bacteria or a virus. However, sometimes it can be caused by fungi.
The infection leads to inflammation of the alveoli and the alveoli filling with fluid and pus, making it difficult to breathe.
Symptoms include fever, chills, shortness of breath, a chronic, wet cough and chest pain when breathing or coughing.
Those who smoke or have other chronic disease are more susceptible to pneumonia.
These are some of the more common lung conditions. There are many effective treatments out there for these conditions and many treatments to ease the symptoms.
If you have been diagnosed with a progressive lung disease, there are always things you can do to improve your situation, with many programs and/or Professionals out there that can help. So do not lose hope!
In the next sections, we will cover what you can do to improve your lung health.
IMPROVING LUNG HEALTH OVER 60
Beyond getting active (which we will cover in later sections), there are some steps you can take to improve the health of your lungs throughout your life, these are:
DON’T SMOKE
We all know that smoking is terrible for our lungs. Smoking also compounds the effects of aging.
If you’re a smoker, although this is not easy to do after years of this habit - if you want to improve your lung health and prevent it from worsening - YOU MUST STOP SMOKING!
There are plenty of good programs and apps out there that can help you quit and many people have successfully quit using these programs. You can also speak to your doctor about quitting next time you visit who will be able to guide you.
AVOID TOXIC FUMES - STICK TO CLEAN AIR
Air pollution - both indoor and outdoor, secondhand smoke, chemicals and dust (both in the home and workplace) can cause damage to your lungs.
Avoid secondhand smoke, stay away from harsh chemicals and avoid breathing in damaging fumes (e.g., cleaning and gardening products). Wear a quality mask if these products are unavoidable.
Stick to clean air as much as you can. If you can make a move to a place with cleaner air, you will do great things for your lungs.
I know that it's not so easy to make a move to a place of cleaner air, so consider taking day trips out in nature or to places with cleaner air.
MAINTAIN A HEALTHY WEIGHT & EAT HEALTHY
In obese and overweight people, there is a strong correlation between lung function and body fat distribution.
Obesity causes compression of the lungs, the diaphragm, and the chest cavity, leading to restrictive pulmonary damage. Additionally, excess fat decreases respiratory system compliance, increases pulmonary resistance and reduces respiratory muscle strength. [6]
On the other hand, being underweight has also been associated with decreased pulmonary function parameters due to low muscle mass and reduced strength and force of the diaphragm and accessory respiratory muscles. [7]
Do what you can to ensure you maintain a healthy weight.
GET MOVING - REGULAR EXERCISE
Regular exercise will strengthen your respiratory and skeletal muscles and improve your lung and other body systems' efficiency.
If you are new to exercise, it's just about getting started, staying consistent and progressing over time.
It is important you gradually build up the amount of exercise you do with any type of exercise, ensuring you don't overdo it.
Aim to spend more time moving and less time seated or lying - gradually building this up.
[We will cover exercise in more detail in the next section]
IMPROVE YOUR OVERALL HEALTH
Our body systems are working together, so it is crucial to improve your overall health. Think about other aspects of your health that you can improve and set out on improving them.
This includes:
Maintaining a healthy weight and getting moving (discussed above).
Minimising junk food and eating a healthy diet full of nutrient-dense foods, so you’re getting all your needed vitamins and minerals and energy. (For more on healthy eating, click HERE).
Decreasing stress and worry. Anxiety, worry, fear, and other strong negative emotions take their toll on health and make breathing more difficult. If you are constantly under stress, speak to your doctor about this. Also, set time aside each day for relaxation and letting go of stress. There are plenty of good apps that can help with this.
Adequate sleep - make this a priority. If breathing difficulties affect your sleep, speak to your doctor about this. (For more on this, click HERE).
Other steps for improved health include getting adequate sunlight, socialising and proper hydration.
GET REGULAR CHECK-UPS
Regular check-ups with your doctor are very important, even when feeling well.
Lung issues can sometimes get unnoticed until it gets serious.
Make sure you see your doctor every six months for a regular check-up.
HOW TO EXERCISE TO IMPROVE LUNG HEALTH

When exercising to improve your lung health, there are some guidelines to follow that will bring the most benefit.
However, try not to get too caught up in it all and wanting to get everything perfect. What’s most important is to just get moving more so, especially if new to exercise.
The more you move (without overdoing it), the better your lungs and respiratory muscles will function, and your fitness will improve. The less you move, the less efficient your lungs and respiratory muscles will be (decreased fitness). It’s as simple as that!
Remember, when you spend less time seated, and more time on your feet, your lung function and overall health will improve.
You ALWAYS want to work your way up to more activity over time, however. Start small and gradually build on this. Slow and steady to get to your goals.
When you do too much too soon, this is where problems (and injuries) can arise.
This section will go through how to exercise to ensure you’re improving your lung health safely and effectively. In the following section, I will cover the basics of exercising with a lung condition.
EXERCISE FOR HEALTHIER LUNGS
We’ve established that getting moving more is the key to healthier lungs. However, sooner or later - once you’ve got the hang of it, or you notice what you’re doing isn’t giving you the results that you want - you’re going to have to change things up to keep getting results.
There are some guidelines to follow to do this.
To determine how to exercise for improving lung health, we will make this easier by following the F.I.T.T Principle. (Frequency, Intensity, Time and Type).
HOW OFTEN SHOULD SENIORS EXERCISE TO IMPROVE LUNG HEALTH (FREQUENCY)
To exercise for better lung health, you want to be exercising at minimum, three times per week and optimally five times per week of exercise that gets that heart rate up and lungs working. Again, you would build up to more over time.
You’d also want to be doing strengthening exercises at least two days, preferably three days, per week.
Being active on most days, preferably all days in some way, is best. The more you’re moving the better.
It does not have to be a specific type of exercise. You can choose the exercise or activities you enjoy (we will get to this soon).
HOW HARD SHOULD SENIORS EXERCISE TO IMPROVE LUNG HEALTH (INTENSITY)
The intensity of exercise is how hard you exercise during each session. Or, how much you are exerting yourself.
To improve your fitness and lung function, a certain level of stress needs to be applied to the body and respiratory system.
A simple way to know the intensity of the exercise you are undertaking, you can use a Rating of Perceived Exertion (RPE) Scale. [See below].

RPE SCALE - To download click above.
To use this scale to determine exertion during exercise, you simply ask yourself, “how hard does this exercise feel to me” based on the numbers and how difficult the exercise feels as per the scale.
If the exercise feels too easy (point 7-9), increase the intensity of the exercise to increase the number/points. If the exercise feels too difficult (point 16+), decrease the intensity of the exercise to bring the number down.
As you can see, this is a simple way to determine and track how much you are exerting yourself during exercise (or the intensity) without using technology and heart rates.
For optimal results to improve your lung health, you want to ensure you are exercising for a set time at moderate intensity. This would be an RPE of 13 (somewhat hard - slight breathlessness, can talk - 70%) to 15 (hard - increased sweating, able to push and still maintain proper form - 80%).
This may sound confusing, but once you’ve downloaded the table and had a look, it’s quite easy to work out.
You then would want to stay consistent at this level 3 to 5 times per week.
As you stay consistent with the exercise, you will find you are doing more exercise to stay in that 13-15 range.
TO DOWNLOAD and PRINT an RPE scale to use, you can do this HERE.
HOW LONG SHOULD SENIORS EXERCISE TO IMPROVE LUNG HEALTH (TIME)
We now know how much we should be exercising each week and at what intensity.
We now need to determine how long to exercise for each session, each day and each week.
When exercising to improve lung function, aim for 30-60 minutes per session. Or aim to achieve 150 - 300 minutes per week of moderate-intensity physical activity each week.
You can break this up during the day into shorter sessions if you have difficulty with longer, continuous exercise.
As stated earlier, some exercise is better than nothing, and on some days, you will find it hard to get moving. That’s ok! Do your best! And always be nice to yourself. :)
WHAT TYPE OF EXERCISE SHOULD SENIORS DO TO IMPROVE LUNG HEALTH
Now, it’s about deciding on what type of exercise to do.
When it comes to the type of exercise - the world is your oyster! :)
There are so many different types of exercise you can do. Get creative.
You can choose between the many MORE LIFE HEALTH EXERCISE VIDEOS. (Click for videos). Or longer exercise routines HERE.
Make sure you’re also signed up to the More Life Health Mailing list to get a FREE 4-week exercise ebook that you can follow along with to help get you started. (CLICK to Join)
Another type of exercise is walking. Walking is an excellent type of exercise to help improve your fitness, and you can vary the difficulties and intensities. Make sure to check out my article on walking HERE.
You can also go hiking, swimming, to the gym, treadmill, cycling, rowing, taking an aerobics or swim aerobics class.
Maybe it’s gardening, playing golf, tennis or playing with the grandkids.
Whatever it is, there are plenty of ways to get moving and to make it enjoyable.
But remember - no matter the type of exercise — always build it up. And always speak to your doctor before undertaking exercise.
If you’re stuck or want to get ideas of what others are doing, join the More Life Health Support Community for help. You can do this by clicking HERE.
PROGRESS THE EXERCISE AS YOU IMPROVE, SO YOU CONTINUE TO IMPROVE
Once you have been exercising for some time and you’re well into the swing of things, your body will be improving.
You’re now consistently exercising - you’re working your skeletal muscles, working your respiratory muscles, working your heart muscles and your lungs and other body systems.
By doing this, your body and lungs are becoming more efficient, and you now have improved tolerance to the demands and stressors of daily life.
Eventually, the exercises will become too easy as your body adapts. To continue to improve your health and fitness, you must gradually increase the exercise.
You do this by increasing the distance, speed, weight, repetitions, or sets, so you continue to challenge yourself and continue to make improvements towards your goals.
IMPROVING LUNG HEALTH - EXERCISE SUMMARY:
FREQUENCY of exercise:
3-5x per week of exercise that increases the heart rate.
2-3x per week of strengthening exercise.INTENSITY of exercise:
Moderate intensity exercise - 13-15 Rating of Perceived Exertion (RPE).TIME spent on exercise:
30-60 minutes per session (or per day if unable), or 150-300 Minutes per week.
Some exercise is better than no exercise.TYPE of exercise:
The world is your oyster - get creative.GRADUAL PROGRESSION of exercise:
Stay consistent. When you do this, the exercise will become easier. It's now time to progress the exercise gradually so you continue to improve.
EXERCISING WITH A LUNG CONDITION
When you have a lung condition, the thought of exercising can be intimidating and scary, especially when you haven’t done much exercise previously.
Breathlessness can also be scary, and fears can arise around this.
This fear causes many to avoid activities that may increase that breathlessness. With the avoidance of exercise and therefore less activity, your body will become weaker, and the body systems will become less efficient.
As time goes by, it then becomes even more challenging to exercise. The feelings of breathlessness increase as your body now requires more oxygen to work at less effort, and the cycle repeats. The less active you are, the more your symptoms will increase.
I have just described the cycle of inactivity and this can be common in those with a lung condition—[See diagram below].

Negative Cycle of INACTIVITY
This cycle of inactivity demonstrates why getting moving is so important when you have a lung condition.
When you exercise, your musculoskeletal, respiratory and cardiovascular systems are all being worked, which are vital to improving your lung health.
To overcome and avoid this cycle of inactivity and turn it all around, it starts with being aware and overcoming those fears of breathlessness.
Breathlessness during exercise, although uncomfortable, is normal and will help improve the condition of your body and your lungs.
The next step is to get active and remain active.
You do not have to do a lot of strenuous exercises. The key is just to get started and gradually build it up in the same way as we described in the last section.
You don’t overexert yourself, but you go at your own pace and stay consistent.
You don’t want to overexert yourself with exercise. Take it slow. You are in no rush and here for the long term. Doing too much too soon will have the opposite effect.
Once you begin and stick to it, this all gets much easier.
When you do this - you’ve beat the cycle of inactivity and the opposite happens!
As a result, you feel your body getting more conditioned. You feel stronger with less breathlessness (your body is now using less oxygen for the movement and is more efficient). The fitness of your lungs and heart are improved.
You will notice the activities you do, both during the exercise and in your daily life, which were once strenuous, are now getting much easier, and overall you feel much better.
You slowly and gradually build it up as you feel your body adapting to the exercise, and you're getting stronger and fitter. You see the importance of exercise and physical activity, which motivates you to continue. So you do!
A positive activity cycle is your new relationship with exercise, and it becomes the norm. [See diagram below].

Positive Cycle of ACTIVITY
Exercising with a lung condition does not have to be something done on your own.
If you are new to exercise and have a chronic lung condition, I recommend you see a Physiotherapist or join a Pulmonary Rehabilitation Program in your area. Doing this is the best (and safest) way to learn how to exercise if you have a chronic lung condition. It will ease a lot of fears you have around your exercise also.
Additionally, your exercises will be prescribed to you based on YOUR current health status and the goals YOU want to achieve.
These programs can be one-on-one or group sessions and are run by Health Professionals in your area.
Your doctor will speak to you about joining a program like this. Or if they haven’t, bring this up to your doctor next time you speak. Or your can do a quick google search to see if there are any pulmonary rehabilitation programs in your area, and give them a call to find out more.
Getting up and moving more is the key to improving your condition when you have a lung condition.
Aim to spend less time sitting and more time exercising. We are not built to be sitting so much.
There are many ways to go about your exercise if certain ways aren’t working for you. There ARE ALWAYS ways that will work, it is just about finding these ways.
One way is you can break up the exercise during the day into shorter sessions if having difficulty with longer, continuous exercise. You don’t need to do 30-60 minutes at once, 5x per week. Especially to begin with. Break it down, start small and build it up, gradually over time.
Do your best to stay positive. You can and will make progress!
If you’re having trouble with your exercise, working with a professional can help put your worries at ease and help make everything much more manageable and help you get the most out of your exercise.
BREATHING EXERCISES FOR IMPROVING LUNG HEALTH
These exercises below are specific exercises designed to help improve your breathing, strengthen the muscles of your respiratory system and help you relax, which will also help improve your breathing.
You can do these exercises once or twice a day.
NOTE BEFORE: If you feel light-headed or dizzy when doing these exercises, stop the exercises. As with all exercise, make sure you see your doctor before undertaking these breathing exercises.
BREATHING EXERCISES FOR SENIORS
To begin, make sure you’re sitting upright in a chair, you’re comfortable, with your shoulders back and down and your body relaxed.
EXERCISE 1: RELAXATION
This exercise is to help you relax in general and before beginning the exercises. Breathing will be more difficult when more anxious, worried or stressed. Try these breathing exercises throughout the day to help you relax!
HOW TO
Begin in the relaxed position above, with good posture. Gently close your eyes.
Breathe in gently through your nose and then out gently through your nose.
If you can't breathe out through your nose, breathe out through your mouth instead -if you breathe out through your mouth, it's better to breathe out with puckered lips or using 'pursed-lip' breathing - to slow your breathing.
Keeping your body relaxed throughout - as you breathe out, let go of any tension in your body.
As you continue, gradually try to make each breath slower.
Continue until you feel relaxed and ready to move on.
EXERCISE 2: DEEP BREATHING WITH INSPIRATORY HOLD
Deep breathing exercises help get the air into all lung lobes and can help to loosen any mucus making breathing easier.
HOW TO
Sitting in the upright posture described above, with your shoulders back and down. Relax - relax your chest and shoulders.
Take a slow, long deep breath in through your nose.
Hold the air in your lungs for 2-3 seconds before breathing out (this is known as an inspiratory hold).
Breathe out slowly, gently and relaxed. Don't force the air out.
Repeat 3 – 5 times.
If you feel light-headed or dizzy, stop the exercises and take a break - focusing on relaxing your body.
EXERCISE 3: ABDOMINAL BREATHING
Abdominal breathing helps strengthen your diaphragm and other accessory respiratory muscles.
HOW TO
Sitting in the upright posture, with your shoulders back and down. Relax - relax your chest and shoulders.
Place one hand on your chest and the other hand on your belly.
Inhale, taking a long, slow deep breath through your nose and towards the hand on your belly, whilst your chest remains relatively still.
You should feel the air moving through your nose into your abdomen, lifting your hand on your belly up and expanding your sides at the waist.
Now exhale slowly with puckered lips (or the pursed-lip position) and feel the stomach contracting.
Repeat 3 – 5 times.
EXERCISE 4: QUICK SNIFFLES
This exercise can help strengthen your diaphragm and accessory respiratory muscles.
HOW TO
Sitting in the relaxed position described above, with your shoulders back and down. Relax - relax your chest and shoulders.
Close your mouth
Breathe in and out of your nose quickly.
Repeat for 15-30 seconds.
BREATHING EXERCISES FOR SENIORS (VIDEO)
Do you have a lung condition? Or trouble with your breathing? Have you made improvements with your breathing? Or do you have a story you want to share? What have you found to help with your breathing and improve your lung health? I’d love to know. Let me know in the comments below!
SOURCES
CLICK HERE TO VIEW ALL SOURCES USED IN THIS ARTICLE.

Exercises To Improve Your Posture | Posture Exercises For Seniors
In this video, we cover seated and standing posture exercises for seniors and we go through a simple self-massage technique and some relaxation.
Seated and Standing Posture Exercises for Seniors
Join me for these seated and standing posture exercises and we go through a simple self-massage technique and some relaxation!
In this video we cover:

Do your best and any questions ask below!
- Mike

Pelvic Floor Exercises For Seniors (For Women And Men)
Use this video to help give relief from your symptoms and improve the strength of your pelvic floor (important if you have issues with incontinence).
Kegel Exercises For Strengthening The Pelvic Floor
Join me (Mike - Physiotherapist) for some exercises and more to help strengthen the muscles of your pelvic floor.
Use this video to help give relief from your symptoms and improve the strength of your pelvic floor (important for incontinence).
Learn more about what a pelvic floor is.
Understanding the Pelvic Floor
We're going to talk about something that is often overlooked - the pelvic floor.
Picture this: deep within your pelvis, there's a group of muscles playing a huge role in your body, kind of like unsung heroes. These muscles support your bladder, bowel, and, for women, the uterus. Pretty crucial stuff, right?
Now, you might wonder why we don't talk about these muscles more. Well, they're a bit shy, hidden away, but they are key players in your body's support system.
As we age, just like any other muscle, they can lose some of their oomph. That's why keeping them in tip-top shape is extra important, especially for seniors.
Benefits of Pelvic Floor Exercises for Seniors
Okay, so why should you, as a senior, befriend these pelvic floor exercises? First off, they're like a secret weapon against incontinence. Yes, those annoying trips to the bathroom might become less frequent!
But wait, there's more. These exercises can also help reduce pelvic pain and even improve your bedroom life – talk about a win-win!
Imagine having more control over your bladder and bowel movements. It's like gaining a new level of freedom in your golden years. Plus, if you've had any surgeries down there, these exercises are fantastic for recovery and strength.
And the best part? You can do these exercises discreetly, anywhere and anytime. No special equipment or gym membership is needed. It's all about giving those hidden muscles a little TLC.
Preparing for Pelvic Floor Exercises
Before you jump into these exercises, let's make sure you're all set. First things first, it's a good idea to have a chat with your doctor. They can give you the green light and any specific advice tailored for you.
Next up, find a comfy spot. You can do these exercises lying down, sitting, or standing – your choice. The key is to be relaxed and focused. Wear comfortable clothing that won't restrict your movement.
Now, identifying your pelvic floor muscles is crucial. A neat trick is to try stopping your urine flow midstream next time you're in the bathroom. The muscles you use to do that? Those are the ones we're focusing on.
Remember, like any exercise, start slow and be patient with yourself. It's not a race; it's more like nurturing a plant. A little care each day, and you'll soon notice the benefits!
In this video I explain a bit about the pelvic floor, how to locate the pelvic floor and we go through exercises for the pelvic floor (which can help with issues that could develop in this area), and more! So make sure to check it out!
If you were eagerly waiting for this video, thank you for your patience and I hope this video helps you!
Remember to stay consistent with the exercises to get results.
In this video we cover:

Do your best and any questions ask below!
- Mike

Full Workout To Improve Muscular Endurance For Seniors
In this video, we go through an intermediate full workout muscle endurance exercise video working the whole body to get stronger, improve your muscular endurance and fitness.
Improve Muscular Endurance (Intermediate Level) - with weights
Join me (Mike - Physiotherapist) for this full endurance workout. We get straight into it today!
I have added the upper-body and lower-body endurance exercises together with a warm-up and cool down - This video uses hand weights and a resistance band and we do higher reps for a little more intensity. Make sure to start with lighter weights for this video. If new to weights I would not recommend starting here, start at my introduction to weights exercise video.
Get stronger, improve your muscular endurance and fitness. Move better, feel better. This session goes for 35 minutes.
So let’s get moving!
In this video we cover:

Do your best and any questions ask below!
- Mike

Upper Body Endurance Exercises For Seniors
In this video, we go through an intermediate upper body endurance exercise video working the upper body to improve your strength.
Improve Upper Body Endurance (Intermediate Level)
Join me (Mike - Physiotherapist) for a new Strength Saturday Exercise Session (#7). Where we work the endurance of our Upper Body!
This week we are going to continue working our muscular endurance but this time for the upper body. Or more specifically the muscles of the chest, the back, the shoulders, and the arms by doing exercises for higher repetitions, with a resistance band and hand weights.
Muscular endurance for the upper body is required in your daily life when doing tasks that use the upper body for prolonged periods (eg. carrying shopping bags) and is also good for your posture.
Again… If you’re a beginner to these exercises, start with the first set and do what you can. Over time keep challenging yourself to do a little more. Gradual progressions!
So let’s get moving!
In this video we cover:

Do your best and any questions ask below!
- Mike

Leg Endurance Exercises For Seniors
In this video, we go through an intermediate leg endurance exercise video working the legs to improve your strength.
Improve Leg Endurance Exercises (Intermediate Level)
Join me (Mike - Physiotherapist) for a new Strength Saturday Exercise Session (#6). Where we work the endurance of our legs!
Today we are not only going to work our strength, but we are going to focus more so on our muscular endurance!
In case you have forgotten, Muscular strength is the amount of weight you can lift or move.
Muscular endurance is how many times you can move or lift that weight, before you get exhausted.
Muscular endurance is important in your day to day life, to move and to lift things. Think about when you are to walk up a large flight of stairs, or go on a large walk (especially with hills). Your muscular endurance is being tested.
As with any component of fitness, muscular endurance can be trained and improved…. at any age.
Which is what we do today. Today’s exercise video we do higher repetitions and use equipment to work that muscular endurance (and strength).
So let’s get moving!
In this video we cover:
Do your best and any questions ask below!
- Mike

Seated Strength Workout For Seniors
In this video, we go through a 15 minute seated strength exercise video working the whole body to improve your strength and range of movement.
Full Strength Workout For Seniors (15 Minutes - Seated - Equipment)
Join me (Mike - Physiotherapist) for Strength Saturday Exercise Session # 5. This session is completely seated using weights, ankle weights, and a resistance band working the whole body.
And, on this Saturday (and always), I want you to remember that we all have a tendency to overestimate others and underestimate ourselves……. You’re better than you think!
So let’s get moving with today’s workout!
In this video we cover:

Do your best and any questions ask below!
- Mike

Beginner Seated Resistance Band Exercises For Seniors
In this video, we go through a beginner seated exercise video working the whole body to improve your strength and range of movement.
10-Minute Seated Resistance Band Exercises For Seniors (Beginner)
I’m sure you know the importance of having good physical strength.
There are many benefits that come from being stronger but to summarise, when you have good strength, life is going to be much easier.
And…… you can get stronger at ANY age, by training your strength.
Strength is the most important component of fitness you can work on. When you train to get stronger you will find other areas of your fitness improving also. For example, improved cardiovascular fitness, improved balance, coordination, weight loss and more.
This is why I started Strength Saturday. To dedicate a whole day to strengthening exercises, so workouts can be varied, and many areas can be targeted.
So let’s get moving with today’s workout!
In this video we cover:

Do your best and any questions ask below!
- Mike

Advanced Strengthening Exercises For Seniors
In this video, we go through an advanced strength exercise video working the whole body to improve your strength and range of movement.
10-Minute Strength Workout For Seniors (Advanced)
Join me (Mike - Physiotherapist) for another Saturday exercise session to get you stronger. (Strength Saturday No.3). This session is more advanced level.
When your body is stronger, life will be easier. Improve your strength each week with hand weights, resistance bands, and ankle weights.
Remember there is never a one-size-fits-all approach to exercise (and for getting healthy for that matter).
However, to make improvements with exercise, there is a process. Tonight I just wanted to remind you of that process.
The first step is finding where you are currently at.
I see and hear from a lot of people who get disheartened when they can’t do certain exercises, or they feel as if everyone else is doing so well and they’re not……..
But this does not matter. Forget all this and Find YOUR capabilities.
Once you’ve done this, you want to stay consistent exercising at your level. Soon enough the exercises will become easy as you get stronger and fitter.
It’s now time to progress the exercises so you continue to make improvements, as you have now reached a new level.
There are many ways you can progress exercise. From increasing repetitions, increasing sets, increasing the weight, decreasing the rest time, increasing time exercising and more. Slow and steady. You’re in no rush.
There are also ways to modify the exercises to make them less challenging if they are too difficult. Sometimes we need to take a step or two back before we can move forward.
So let’s get moving with today’s workout!
In this video we cover:
Do your best and any questions ask below!
- Mike